Category: Food

my monthly menu planning calendar

monthly menu planning calendar - printable

When late afternoon rolls around, do you already know what you’re going to cook for dinner, or do you look at what’s in your fridge and try to figure out what you can make with what you have on hand?

I applaud those of you who can throw things together and come up with a great meal, but not surprisingly, I’m one of those people who likes to have it all planned out. Otherwise, I’m sure I’d be missing some key ingredient I wish I had picked up at the grocery store, or I’d want to use chicken breasts that should have been thawing in the fridge for a day. I’ve been planning my meals in advance ever since I got married, but I didn’t get organized with menu planning until about a year and a half ago.

There are lots of menu planning systems out there, ranging from very basic to wildly complicated. I like to keep things simple, so I just use a blank calendar. You could hang it on your fridge, but I like to keep mine in a notebook. I use a small binder that holds 5-1/2 x 8-1/2″ sheets, because it takes up less room on my desk. I print out the calendar pages, cut them in half (there are two on a sheet), punch holes in them, and stick them in my binder.

monthly menu planning calendar - printable

I added two little Post-it tabs to the edge of my calendars to mark the sections, because I’m using a second set of calendar pages as my editorial calendar for this blog. I’m taking a more organized approach to blogging this year, so I’m hoping to post more often in 2014.

monthly menu planning calendar with post-it tabs

Before I shop for groceries (ideally once a week), I sit down with my menu planning calendar, my binder of favorite recipes, and the sale flyer for our local grocery store. I pencil in what we’re having for dinner for the next 5-7 days, then develop my shopping list based on my menu plan. I’ve gotten into a terrible cooking rut, so the menus aren’t nearly as varied as I would like, but that’s a topic for another day!

The calendar is one I designed myself, and you can download the 2014 calendar as a free PDF. I like to have only five rows of squares on each calendar page, so there are three instances where the first or last day of the month is on the previous or next month’s calendar page. My calendar, my rules.

Of course, the printable calendar can be used for anything, not just planning meals, so hopefully some of you will find it helpful.

chocolate dipped pretzels for Valentine’s Day

white chocolate dipped pretzels

I love tiny things. Make something smaller than usual, and it’s instantly more interesting. I think that’s part of the reason I’ve been making so many chocolate-dipped pretzels recently. Mini pretzels + mini heart sprinkles + chocolate = adorable little Valentine’s treats.

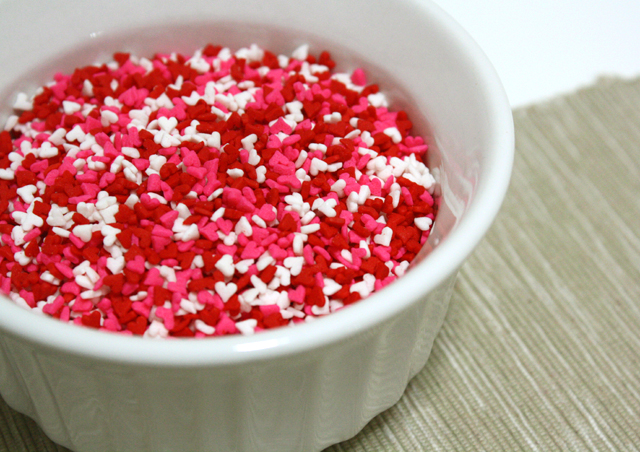
mini heart sprinkles

I found these itsy bitsy heart sprinkles in a bulk package at my local grocery store, but Wilton also sells them as “micro heart sprinkles.”

Just melt your chocolate in a double boiler (I used semi-sweet chocolate chips and white candy melts), then dip your pretzels in the chocolate. Sprinkle with the tiny hearts and place on waxed paper to harden. These would make a pretty little gift for a friend, neighbor, your child’s teacher, or anyone else you love or appreciate! Most of mine disappeared during the Super Bowl party we hosted on Sunday evening, so I’ll need to make more soon.

chocolate dipped pretzels

P.S. Is it just me, or do you think the pretzels with milk chocolate look like little masked bandits?! Or maybe like they’re ready to attend a Valentine’s masquerade ball!

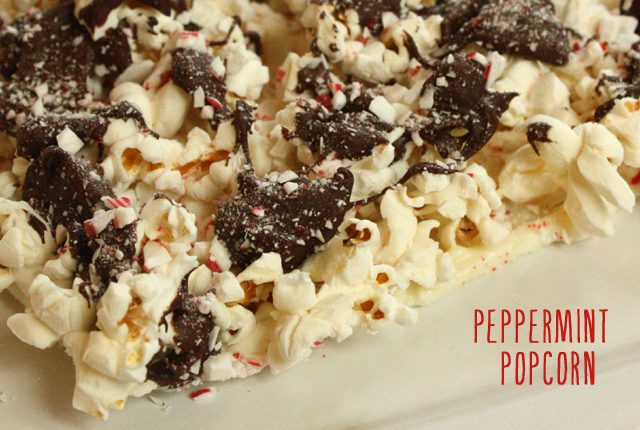
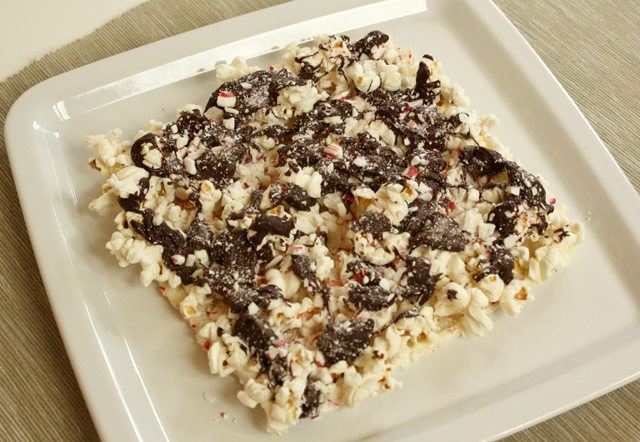
peppermint popcorn

Peppermint Popcorn

Did you know that there is a National Popcorn Day? And did you know that it’s today, January 19? Popcorn is a snack worth celebrating, so I decided to make a batch of peppermint popcorn for an afternoon snack, inspired by this recipe from Our Best Bites.

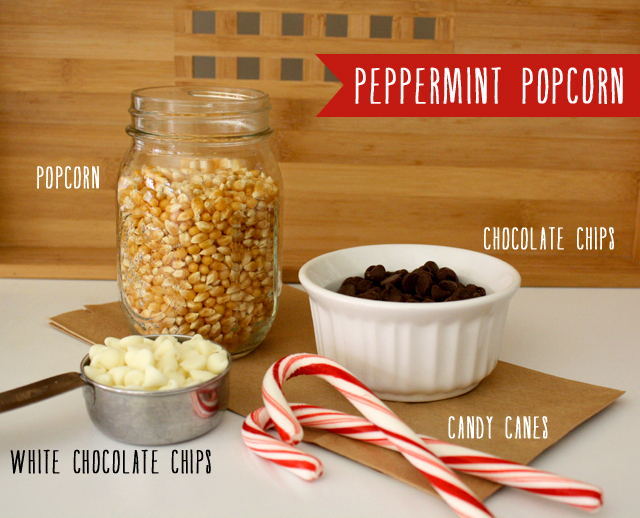
Ingredients:

popcorn
white chocolate chips
semi-sweet milk chocolate chips
candy canes

Peppermint Popcorn

How I put it all together:

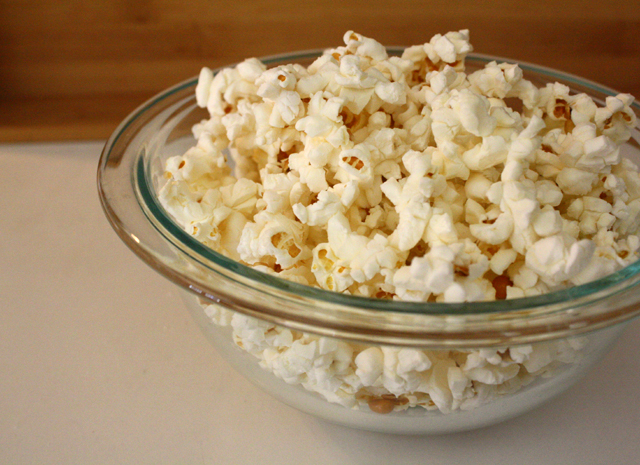
It’s best to use salt-free, butter-free popcorn for this sweet treat, so I popped the popcorn in the microwave in a brown paper bag. Just put the popcorn in the bag without any oil or anything, fold over the top of the bag, and microwave it until it stops popping. (Read more about making your own popcorn in the microwave.) For this recipe, I popped 1/8 cup of popcorn kernels, and I had twice as much as I needed.

popcorn

Line an 8×8″ baking pan with aluminum foil and spray lightly with oil. Put a bunch of white chocolate chips in the pan and place it in a warm oven. When the chips have melted, remove the baking pan from the oven and spread out the melted chips with a knife. Sprinkle with two thirds of the crushed candy canes, then add a layer of popcorn. Push the popcorn down into the melted white chocolate.

Meanwhile, melt the chocolate chips in a double boiler. (I use a metal bowl set into a small kettle.) Spoon the melted chocolate chips over the popcorn and sprinkle with the remaining candy cane pieces. Place it in the refrigerator to cool. Enjoy!

Peppermint Popcorn

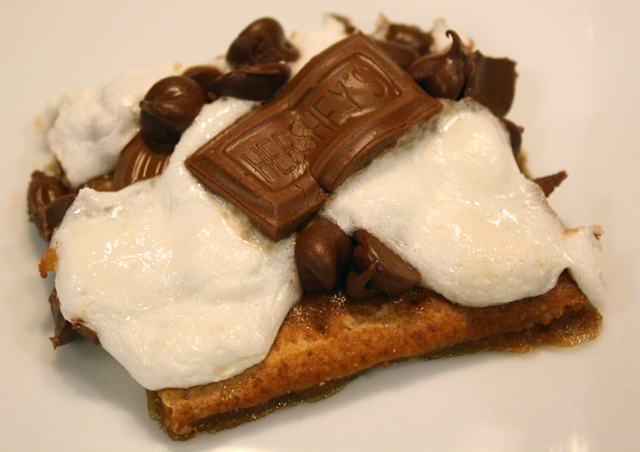
s’mores bars

s'mores bar

Sometimes I’m really glad for leftovers — especially when the leftovers are sweet and gooey. I baked a pan of s’mores bars for an annual fall fest some friends of ours hosted this weekend, and I was secretly glad to be able to bring a few back home with us.

The recipe is from Bakergirl’s blog, and I discovered it via Pinterest a couple weeks ago. I didn’t follow the recipe exactly, since I couldn’t fit all 15 sheets of graham crackers on my pan, but these s’mores bars were super easy to make… and super delicious to eat! It’s hard to go wrong with graham crackers, butter, brown sugar, marshmallows, and two kinds of chocolate.

s'mores bar

P.S. You can find other yummy-looking foods I’ve pinned on my Pinterest board called “yum.”

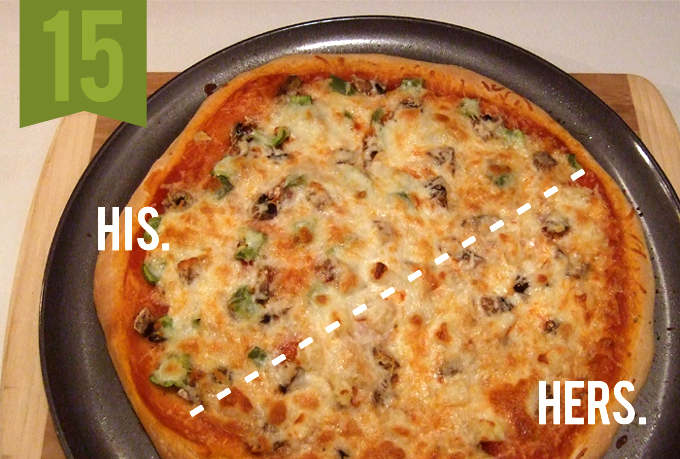
2012 homemade pizza tally: 15

2012 homemade pizza tally: 15

For the past couple weeks, I’ve been neglecting as much as I reasonably can in favor of two main pursuits — watching the Olympics and designing a brand new look for my blog. It’s undergoing a major renovation, and I can’t wait to show you the new layout when it’s ready!

Meanwhile I’ve been trying to keep up with the essentials like laundry, soccer games, shopping for maternity clothes, and eating homemade pizza. The kids were away at “Cousin Camp” on Sunday evening, so I made a slightly smaller pizza for just Tim and me. One half had pineapple; the other did not.

A few years ago, I almost made Hawaiian pizza for Tim for our second date. (My favorite must be everyone’s favorite, right?) Thank goodness I asked what toppings he liked!

I’m curious. What pizza toppings are your favorites? Which ones would you pick off if they crossed the line onto your side of the pizza?

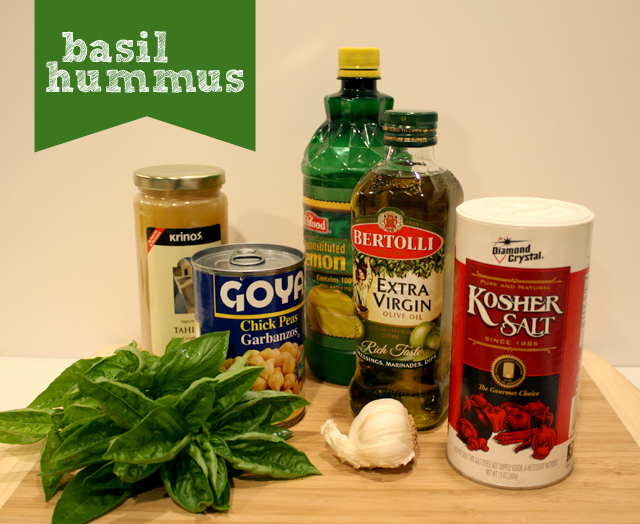
basil hummus

My four little basil plants are growing like crazy! I recently found a recipe for basil hummus, which sounded great, so this evening I cut a bunch of basil and mixed up a batch for dinner. My mouth was watering just looking at the ingredients.

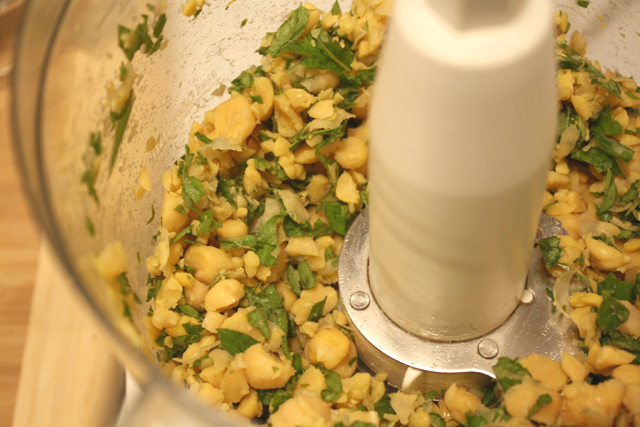
I chopped up the basil and garbanzo beans in the food processor…

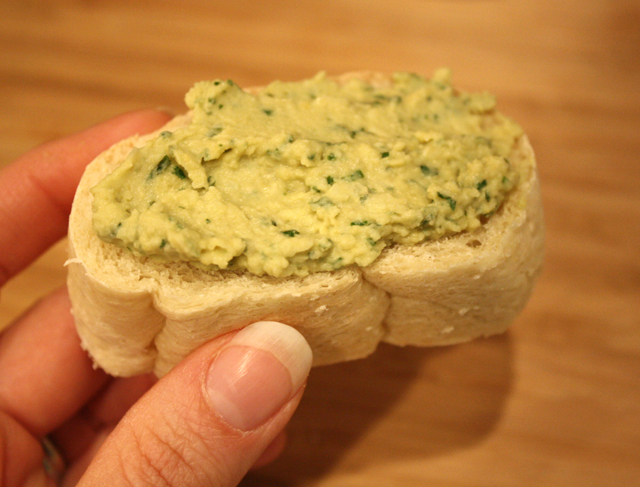
…then added the rest of the ingredients (plus three cloves of garlic!) and kept processing it ’til it was thick and creamy. I spread the hummus on a small slice of homemade Italian bread, and of course it tasted just as delicious as it smelled. Next time I wouldn’t use quite as much garlic, as it almost overpowered the basil.

I served the hummus and bread for supper with homemade broccoli cheese soup (slightly modified from this recipe). It was a perfect meal for a rainy summer evening.

Do you have any great recipes that feature fresh basil? (Besides the obvious pesto, which I’ve actually never made.) I’d love to hear your suggestions!

summer kickoff party 2012

The first day of summer is just around the corner, so we were delighted to have a bunch of friends join us on the patio last evening for our now-annual summer kickoff party.

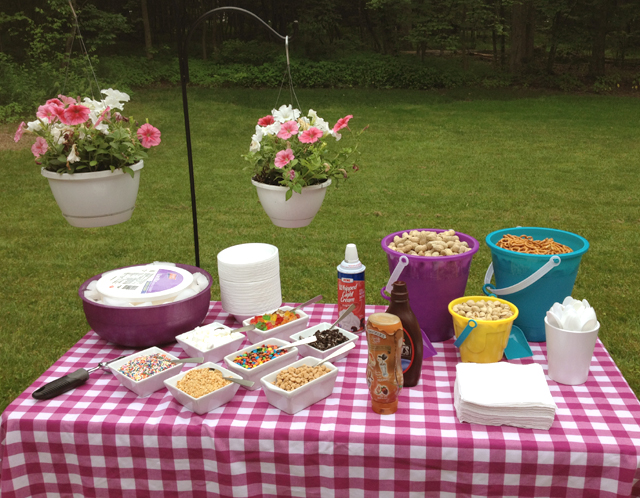
Let’s take a closer look at those toppings on the ice cream sundae bar, shall we?

We served just one kind of ice cream (vanilla) with ten topping options: sprinkles, mini marshmallows, gummi bears, peanuts, mini M&Ms, crushed Oreos, peanut butter chips, chocolate syrup, caramel sauce, and whipped cream. I’m not sad that we have leftovers.

The kids outnumbered the adults 15 to 11, and they entertained themselves with five beach balls, one stomp rocket, and loads of glow bracelets. Michaels sells glow bracelets in tubes of 15 for $1, so I love to hand them out generously at parties like this.

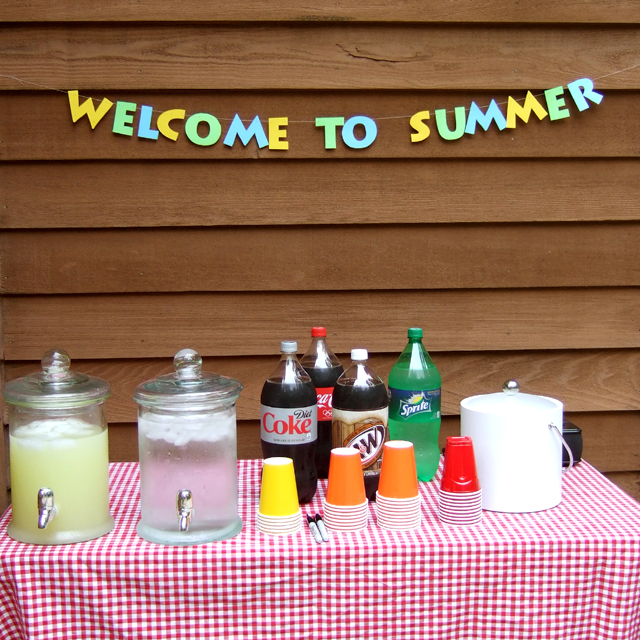
The first official day of summer isn’t until tomorrow, but it feels like it’s already here. Welcome to summer!

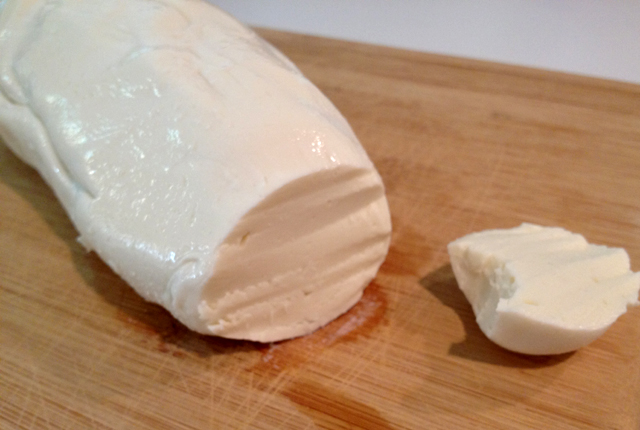
I made mozzarella cheese

On Sunday afternoon, I made mozzarella cheese.

I started with whole milk, citric acid, rennet, and salt — and ended up with 14 ounces of delicious mozzarella cheese. I followed the instructions step by step, and it actually worked! I shouldn’t have been surprised, but I was (and still am). It was art, it was science, it was magic.

I’ve been wanting to make mozzarella cheese for years, so six months ago, I finally added a cheese-making kit to my Christmas wish list. The kit has been waiting patiently in my pantry ever since the holidays. So why didn’t I make cheese sooner? Well, I thought it would take a long time. I thought it would be more complicated. I thought I would become frustrated. I thought it seemed mysterious. I thought it wouldn’t turn out.

And you know what? It did take longer than the instructions said it should. It was a little frustrating when the curd didn’t develop properly. It was certainly more complicated than buying fresh mozzarella at the store. And I still think the process is rather mysterious. But it was actually pretty easy. And it turned out just fine.

I made cheese.

And now I can’t wait to make more. Last night I did some online research to see how I can get the curd to separate from the whey better, and I’m eager to tweak the process a bit.

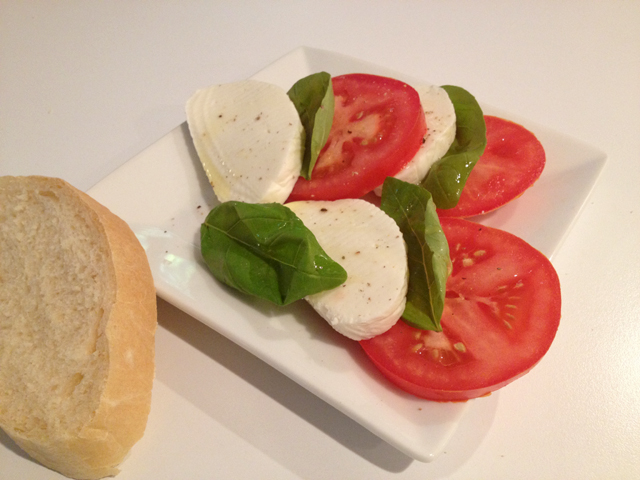
The photos I hurriedly snapped with my iPhone along the way aren’t great, but dinner last evening definitely was.

I made the mozzarella cheese, grew the basil, baked the bread, and bought the tomatoes at a local produce stand. And I’m still a little surprised that I made cheese.

homemade english muffins

Two Fridays ago I stopped by the library on my way home from work and checked out a copy of “The Bread Baker’s Apprentice.” I became familiar with this book a couple years ago when I discovered that a group of people on the internet were systematically working their way through each recipe in the book. I didn’t join them, but their commitment to a long-term baking project intrigued me.

So the day after I brought the book home, I opened it to page 157 and got to work on my very first batch of english muffins. As you may recall, english muffins were one of the items on my list of foods that I want to make from scratch, just to prove that a regular person can make them at home.

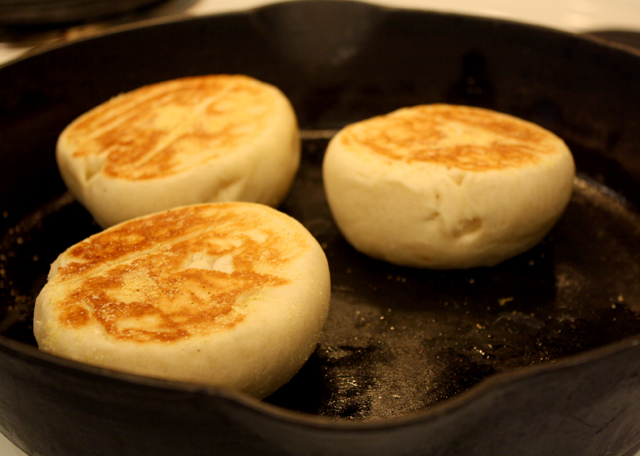
I think I subconsciously expected that I would be able to replicate Thomas’ Original English Muffins, but mine were nothing like those delicious flat, chewy muffins with their trademark nooks and crannies. My english muffins were tall, dense, and somewhat crumbly like a biscuit. And there wasn’t a nook or cranny in sight.

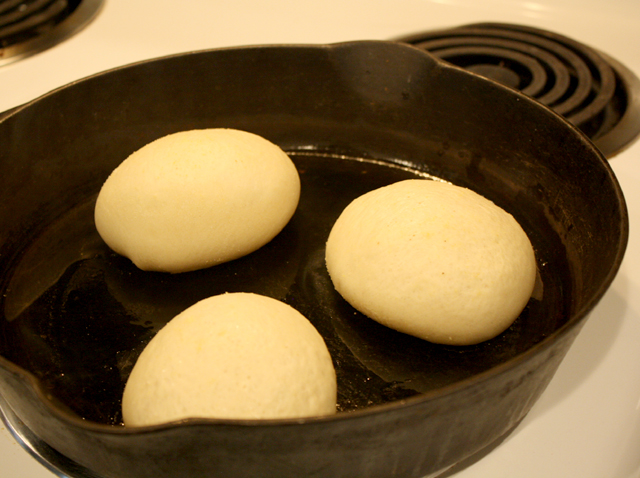
But I learned a few things along the way. I learned that english muffins are first baked on a griddle and then finished off in the oven. I learned that I’m capable of making english muffins that taste good (even without nooks and crannies). And I learned that the recipe in “The Bread Baker’s Apprentice” yields six english muffins and a tremendous amount of personal satisfaction.

P.S. I debated whether to capitalize the letter ‘e’ in the word ‘english.’ As a rule-follower, I knew I should use a capital letter, but it looked awkward. And then I thought about french fries, which are not French fries. Problem solved.

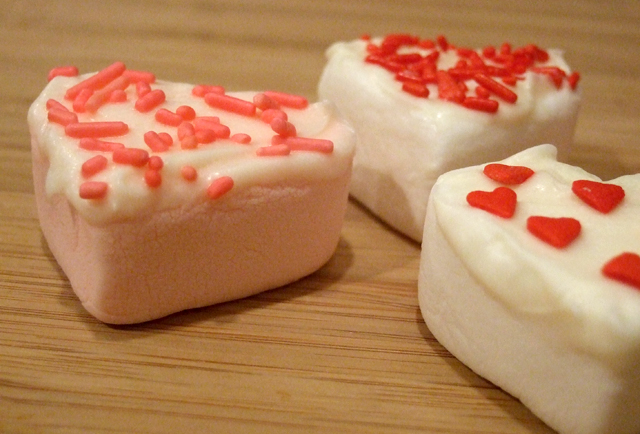
marshmallow hearts with sprinkles

On a whim, I picked up a bag of pink and white marshmallow hearts at the store last week. My kids have been snacking on them as Valentine’s Day approaches, and in the middle of cooking dinner this evening, I decided that it would be fun to decorate a few.

I made these sweet treats in the same way I decorated regular marshmallows with nonpareils last year for Easter. I softened some candy melts in a makeshift double boiler, then dipped the marshmallows in the melted candy and topped them with sprinkles. Seriously, that’s it. They look so much fancier than that, don’t they?

The kids each ate one as an appetizer. Happy Valentine’s Day indeed!

Zippy’s Peanut Butter Blossoms

While we were sleeping last night, Zippy (our Elf on the Shelf) baked some cookies. Unfortunately, he made a terrible mess, but we’ll forgive him since the mini peanut butter blossoms are so soft and delicious.

The kids and I baked peanut butter blossoms together after school on Monday, so Zippy used some of the dough that I had secretly tucked away in the fridge. When Hayden saw Zippy’s tiny cookies this morning, he said, “He shrunk them!”

If your family has an Elf on the Shelf, perhaps you could pass along this recipe to your little elf.

ZIPPY’S PEANUT BUTTER BLOSSOMS

1 stick butter
1/2 c. peanut butter
1/2 c. brown sugar
1 egg
1 t. vanilla
2 T. milk
1 1/2 c. flour
1/2 t. baking soda
1/2 t. salt
granulated sugar
chocolate chips

Cream together butter, peanut butter, and brown sugar. Add egg, vanilla, and milk, beating well. Add flour, baking soda, and salt. Shape dough into balls the size of a large marble. Roll in granulated sugar to coat. Bake on a greased baking sheet at 350° for 4 minutes and 30 seconds. Since the cookies are so small and oven temperatures can vary, watch your cookies carefully to be sure you don’t overbake them. Remove from oven and push a chocolate chip into the top of each cookie.

Enjoy!

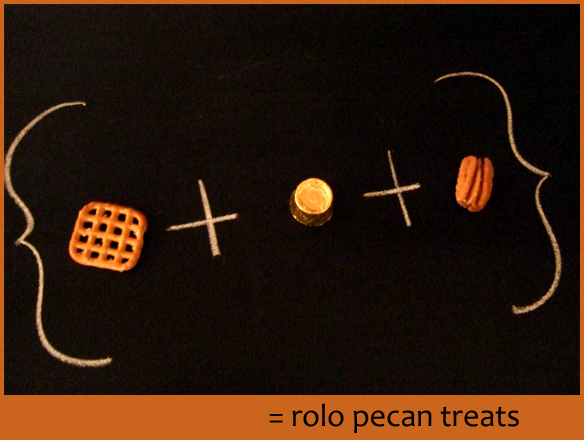
rolo pecan treats

rolo pecan treats

Question: What happens when you smush a Rolo between a pretzel and a pecan?
Answer: You end up with a little stack of deliciousness.

rolo pecan treats

I’ve made several batches of these rolo pecan treats since I discovered this extremely simple recipe about a month ago, but they keep disappearing. It’s so mysterious…

rolo pecan treats

microwave popcorn in a brown paper bag

Did you know that you can pop popcorn in the microwave in just a regular brown lunchbag? It’s true.

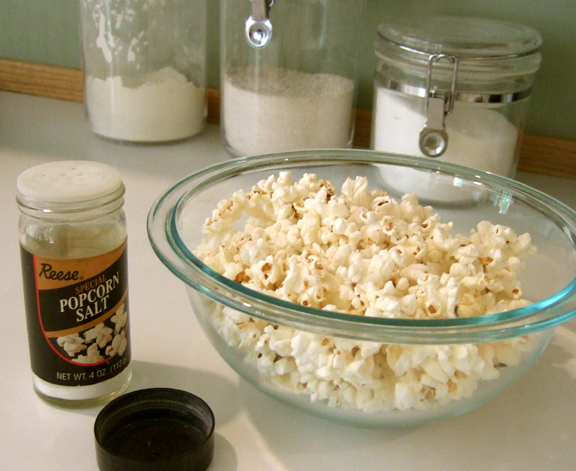
I’ve been seeing various mentions of this on the internet, so when I started feeling hungry this afternoon, I decided to try it out. All I did was put 1/8 cup of popcorn kernels in a bag, drizzle 1/4 teaspoon of olive oil over the kernels, and shake it a bit. Then I folded over the top of the bag two times and put it in the microwave on top of a folded paper towel (to protect the microwave from any oil that might seep through). I nuked it until the kernels stopped popping, put some popcorn salt in the bag, shook it up, and dumped it out into a bowl.

Yum!

When Magen got home from school and smelled the lingering aroma of popcorn, of course she wanted some, so we made a second batch using the same brown bag — and even though it didn’t have any butter flavor like she’s used to, she didn’t waste any time gobbling it down.

I love that popcorn is such a cheap, easy, fun, delicious snack!

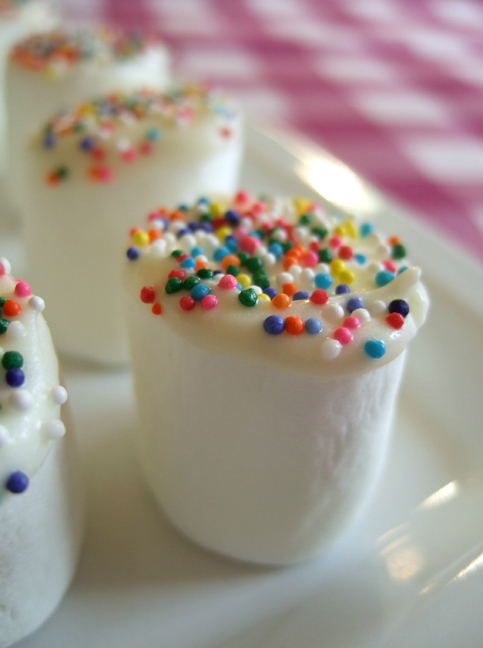
marshmallows with sprinkles

Question: What kind of special edible Easter treat do you make for a kid who doesn’t like chocolate?

Answer: You combine two of his favorite forms of sugar — marshmallows and sprinkles — and end up with the most beautiful, simple treat ever.

A couple weeks ago I saw a picture on the Hip Hip Hooray blog of marshmallows dipped in chocolate and sprinkles, and I knew Hayden would love them if I used something other than chocolate. So today over lunchtime, I took a few minutes (literally — it was so quick) to make my own version with white candy melts instead of chocolate. All I did was melt some white candy discs in a double boiler, dip the marshmallow in the melted goo, and drop some sprinkles on before it hardened.

It would be easy to make these with other colors of melted candy or sprinkles to coordinate with a particular color scheme, but the classic multi-colored nonpareils are fun and cheerful.
my first attempt at homemade ravioli

If you’re looking for instructions on how to successfully make homemade ravioli, you’ve come to the wrong place. I tried to make homemade ravioli for the first time today, and… well, let’s just say that I did not serve ravioli for supper this evening.

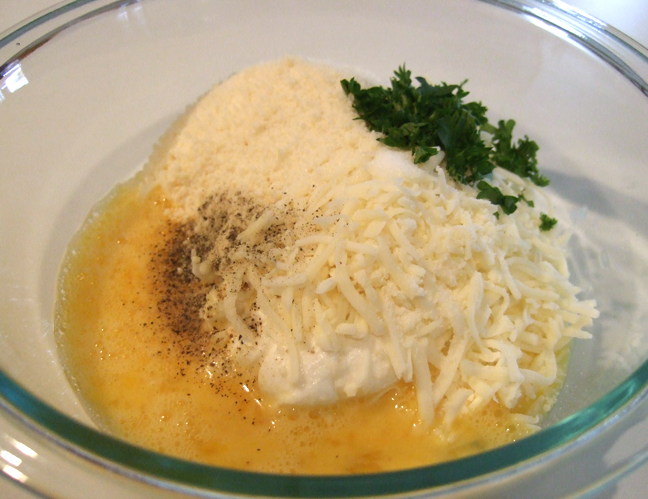
The process of making ravioli started out well. Using this recipe for three-cheese ravioli as my guide, I started by mixed up the filling. Here’s what I included:

1 c. ricotta cheese
1 c. shredded mozzarella cheese
1/4 c. parmesan cheese
2 beaten eggs
1/2 t. salt
dash of black pepper
1 T. fresh parsley, chopped

So far, so good.

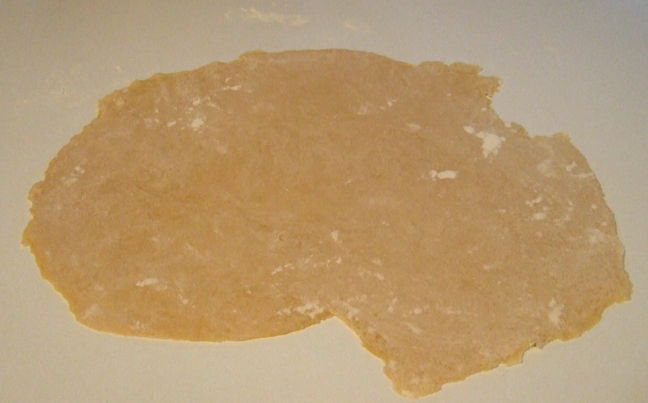
Next I needed to make the pasta dough, which is when things started going downhill. I used the dough hook on my KitchenAid mixer for the first time as I combined the ingredients. The dough was much too dry. In hindsight, I should have added more water while it was still in the mixer, but I wanted to stick to the recipe (courtesy of The Food Network) as much as possible. I did add a little water just to make it form a nice ball on the counter, but it was too stiff to really knead, which is when I started feeling frustrated.

After letting the dough “relax” for half an hour, I tried to roll it out. I don’t know why I bothered to exercise on the treadmill this morning, because rolling out the dough sure felt like a workout! Seriously, it was hard work. I never really got the dough thin enough, but I finally decided that it was good enough and stopped. My dough was supposed to be a rectangle, but ended up looking like Australia.

Note to self: borrow or buy a pasta machine!


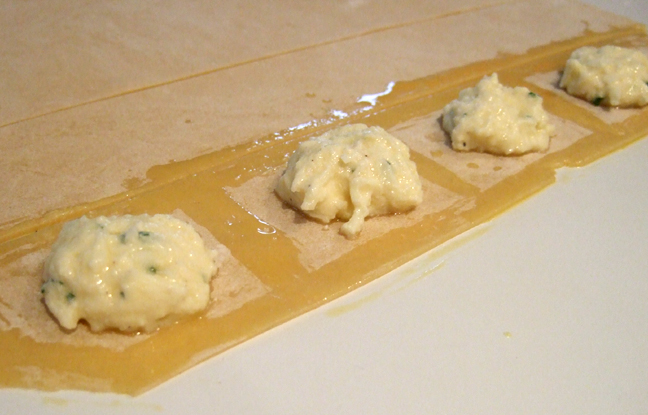
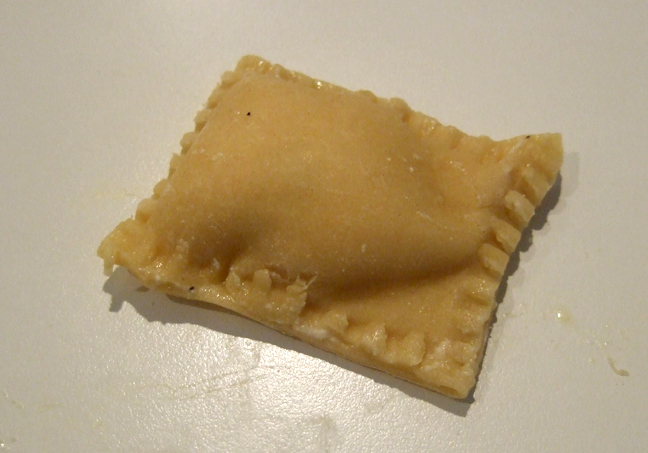
I straightened things up with a knife, plopped little dollops of filling on the dough, and then brushed the edges with egg before I laid another piece of dough on top. Sealing it up was not pretty. My dough was too thick and I used too much filling, which was oozing out the sides.

I made exactly nine ravioli before I gave up. I decided to cook one for a little afternoon snack, and in spite of the fact that it looked a mess before I cooked it, it actually tasted pretty good.

Of course, nine ravioli (actually, eight since I ate one) wasn’t enough to feed a family of four for dinner. Also, I didn’t want my kids to eat these inferior ravioli and then decide that they will never again eat my ravioli. So instead, I served ham, green beans, homemade macaroni and cheese, and french bread that I just baked this afternoon, and my culinary reputation remained intact.

I don’t think there’s much hope for the pasta dough I made, but the three-cheese filling was great, so it will probably end up in stuffed shells in a day or so.

I’d like to try making homemade ravioli again, but not until I have a pasta machine that can roll out the dough for me. Meanwhile, if any of you have made homemade ravioli and have any advice for me, I’d love to hear it!

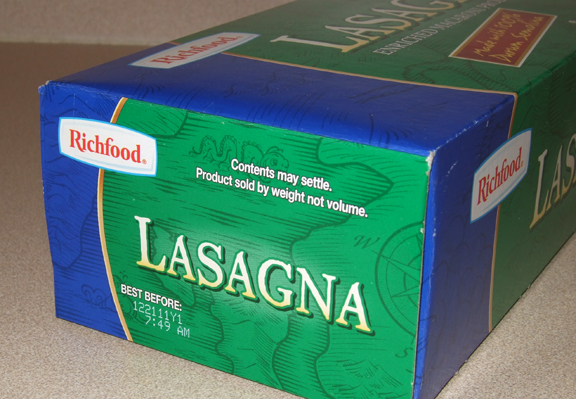
time-sensitive pasta

While I was eating leftover lasagna and catching up on some blog reading over lunchtime just now, I remembered something I’ve been intending to post since Thursday night.

That’s right, folks. Someday just after breakfast, that box of dry lasagna noodles is going to take a sudden turn for the worse…

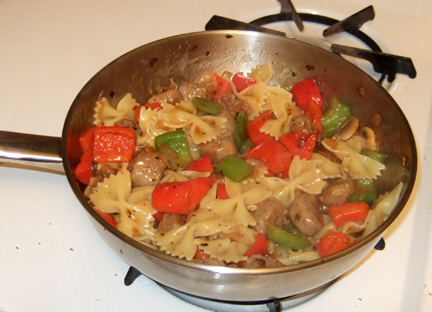
Bow Ties with Sausage and Peppers

It’s a good thing I live only about six blocks from a grocery store, because when I was trying to decide what to make for dinner last evening, I looked in the cupboard and saw a box of bow tie pasta (er, farfalle) and knew that a trip to the store was imminent. I already had a number of items written on my shopping list for the next time I happened to go to the grocery store, so I added “sausage” to the bottom of the list and headed out to the store.

I made Bow Ties with Sausage and Peppers for the first time about a month ago and loved it, so I was eager to make it again. It’s delicious, it’s quick and easy to prepare, and it’s even colorful too. Here’s the recipe, courtesy of the Better Homes & Gardens pasta cookbook.

:: Bow Ties with Sausage and Peppers ::

6 oz. bow tie pasta
12 oz. fresh sweet or hot Italian sausage links, cut into 1/2-inch pieces
1 medium onion, chopped (1/2 cup)
2 cloves garlic, minced
1 red sweet pepper, cut into 1-inch pieces
1 green pepper, cut into 1-inch pieces
1 c. sliced fresh mushrooms
2/3 c. chicken broth
1 T. snipped fresh basil or 1 t. dried basil, crushed
2 t. cornstarch
1 large tomato, coarsely chopped (1 cup) — I omitted this

Cook pasta according to the directions on the box. Drain; keep warm.

Meanwhile, in a large skillet cook the sausage, onion, and garlic for 5 minutes. Add red sweet pepper, green pepper, and mushrooms. Cook about 5 minutes more or until sausage is brown.

Combine broth, basil, and cornstarch. Add to sausage mixture. Cook and stir until thickened and bubbly. Cook and stir for 2 minutes more. Stir in tomato; heat through. [I omitted the tomato.] Pour sausage mixture over pasta; toss to mix. Makes 4 main-dish servings.

Enjoy!

A Bowl of Good, days two and four

I don’t know if you knew this, but you’re not supposed to care what I had for lunch. Usually I’d agree with that, but just this once, I think you’ll need to make an exception.

You see, the much anticipated A Bowl of Good cafe opened on Monday just a few blocks from where I work, and I’ve already eaten there twice.

When I met up with a friend at the cafe on Tuesday, we found ourselves at the end of a long line — not because the service was slow, but because so many people were eager to enjoy the cafe. As we waited, I checked out the surroundings. The building is brand new, so the cafe looks very fresh and modern, and the signage is both professional and fun. (It wasn’t until much later that I noticed a picture of a friend of mine hanging on the wall.) I counted seating for at least 32 people inside, including the trendy stools along a counter next to the front window, but there were also a number of tables outside the entrance (all occupied on the beautiful summer day).

I was pleasantly surprised to see a pair of large glass doors on the one wall that had been rolled open to create a wide doorway into Artisans’ Hope, which sells fairly traded handcrafted items from around the world. Artisans’ Hope just moved from their location in the building next door, and their new retail area is much more spacious. The ease of passage between the two businesses (as part of the Common Good Marketplace, as the building is called) should boost sales for both.

The food options fall into three main categories: Breakfast Bowls, Lunch Bowls, and More Goodness (soups, salads, sandwiches, wraps, and specialty drinks). The Bowls all have fun names, and I’m eager to try out breakfast items like Buenos Dias Bowl and Peace, Love & Granola Bowl. The cafe’s slogan is “Globally Inspired, Local Goodness,” and their menu clearly lives up to that. Lunch options like Maharaja Bowl, All Thai’d Up, Bowl de la Milpa, and Tapas Bowl show a distinct international flair (with plenty of local ingredients), while others have found their inspiration closer to home, such as Mac n’ Jack of the Valley, Red, White & Moo Bowl (featuring local beef), and It’s Nacho-Yo Bowl with “Virginia’s finest nachos.”

I finally settled on Tom Kha Gai Bowl, a Thai coconut chicken soup over rice with lime and cilantro. It was just as amazing as it sounds. It’s hard to be subtle when you’re trying to take a picture of your lunch in a crowded restaurant, but I did manage to come away with this one.

a_bowl_of_good_tom_kha_gai_bowl

See those white strips? I found out tonight that they’re bamboo. Bamboo!

Maybe I don’t get out enough, but I was even impressed by things like the trays (sleek, square, and black) and the plastic cups (clear and smooth, not like the textured ones you’d get at your local pizza joint). And take a look at that table! I’m personally acquainted with the owner, Katrina, and her husband Ernie, and since Ernie and I are friends on Facebook, I happen to know that his father made the tables. The table tops were created by laying down four tiles (there are quite a few different designs) and then pouring a clear resin over it to create a shiny, smooth surface.

When I returned to the office after eating lunch there on Tuesday, I found an email from a colleague wanting to take me out to lunch. Without hesitation, I suggested A Bowl of Good. So on Thursday, I opted for one of the soups of the day, a surprisingly generous bowl of Red, White and Moo soup. The flavor was quite good and the spiciness was just right — plenty of heat, but not too much for my wimpy mouth to handle.

Of the two menu items I’ve tried so far, the Tom Kha Gai Bowl was my favorite, but I’ve decided to order each thing once before choosing something for the second time. I might post some more reviews as I go, but don’t expect them immediately. After all, even though I agree 100%, I’m not THIS customer!

a_bowl_of_good_twitter

apostrophe abuse

This morning before work, I stopped by the Farmers’ Market and bought six ears of corn and a half bushel of peaches. Actually, according to the sign, they were PEACHE’S.

It was one of those signs that was just begging to be photographed, posted on the internet, and mocked. Unfortunately, I didn’t have my camera with me, nor was there a subtle way to snap a picture. In spite of the apostrophe abuse, the fruit was delicious. I don’t know who Peache is, but I’m glad she’s a farmer, not an English teache’r.

Yes, Virginia, There Is a Potluck

Sometime during my backpack-and-lunchbox days, I learned the meaning of the words omnivore, carnivore, and herbivore. Many years later, in 2005, a clever person coined the word “locavore” to describe a person who seeks to eat food that is grown and produced locally, and in 2007 the New Oxford American Dictionary selected “locavore” as its word of the year.

People have been primarily locavores since the beginning of time, but as a result of globalization, food now travels an average of 1500 miles to reach the plates of North Americans. By contrast, locavores eat foods that are grown or produced within a relatively small radius, whether 50, 100, or 150 miles.

During the past several months, I’ve read quite a few books about food:

Thanks to these authors and the locavores I know personally, I’m becoming a locavore too… at least in theory.

August 3-9, 2008 is Virginia Farmers Market Week, and the Virginia Department of Agriculture and Consumer Services is encouraging Virginians to choose one day during that week to eat only food grown in Virginia.

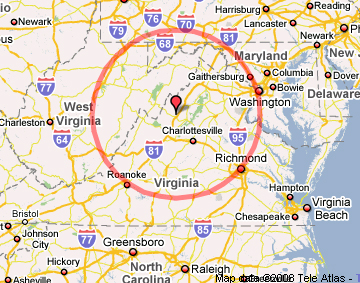
Of course, for me, Virginia-grown is not necessarily the same as local, as there are certainly locations in neighboring states that are closer than parts of my own state, but legalistic is the last thing I want to be when it comes to food. The map below shows the area my food could come from if I were following the 100-Mile Diet. You can see your 100-mile radius area by entering your zip code into the nifty little mapping tool on the 100-Mile Diet site.

I’m not sure yet which day next week will be my Virginia-only day, but I’ve decided to host a local foods potluck at my house on Wednesday evening… and I’m calling it “Yes, Virginia, There Is a Potluck.”

Not every ingredient needs to originate in the Commonwealth of Virginia, but every dish should at least feature locally grown or produced food. If you’d like to come to “Yes, Virginia, There Is a Potluck” and you haven’t gotten an email from me with the details, either send me an email (if we’re already friends) or leave a comment here (if you’d like to be friends). You don’t have to be a locavore or a gourmet chef; the only requirement is that you like to eat good, local food!

making bagels

The other night I mentioned to someone that I had made bagels for the first time over Easter weekend.

“Soft bagels?” she asked.

Apparently she had pretzels on her mind. Unfortunately, it happened to be a very appropriate question. Bagels are supposed to be soft and chewy, but I managed to bake a not-so-soft batch of the World’s Chewiest Bagels. I wouldn’t exactly call them tough… just ridiculously chewy. They tasted good and the process was fun, but the overall outcome left a bit to be desired.

Ever since writing “make bagels” on my list of 101 Things in 1001 Days, I’ve been hoping to find someone who has made them before who could give me some tips. No luck. People think it’s a great idea, and they’ve all said that if I learn how to make bagels, they want my recipe and advice.

(This feels like a weird, inverse version of the Little Red Hen. Nobody said, “I’d love to help you eat the disappointing results of your bagel experiments,” but everyone wants to enjoy the final results of my quest to master the art of bagel-making.)

Lacking a bagel tutor and finding exactly zero recipes for bagels in my cookbook collection, I headed to the internet. As expected, my Google search yielded too many bagel recipes. I didn’t have a clue which recipe would lead to the perfect bagel, so I just looked through a few recipes and picked one.

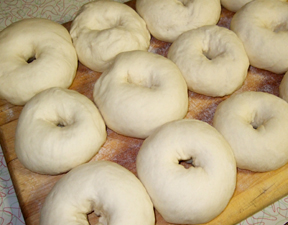
In spite of the variations in recipes, the basic process is pretty standard. You create a batch of dough, knead it, and let it rise. Next you shape it into round balls, poke your thumb through the middle, and try to get it to look like a bagel.

bagels-1.jpg

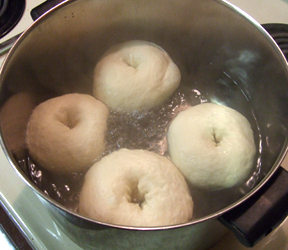
How did I do? 🙂 That’s what they looked like after letting them rise again. Next you cook them in a pot of boiling water for a few minutes. It’s kind of like making donuts, except that donuts are boiled in oil — a.k.a. deep fat fried. Different bagel recipes indicate different lengths of time for the boiling, so I’ll have to experiment with that.

bagels-2.jpg

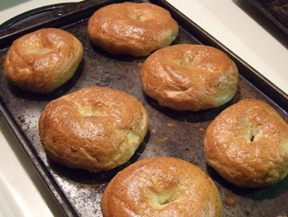
Next you brush the bagels with egg yolk (to make them shiny), add seasonings if desired, and bake them. The recipe I used said to bake the bagels for 35-40 minutes. I checked them after 25 minutes and they were already overbaked.

bagels-3.jpg

Looks can be deceiving. They’re beautifully golden brown, but eating them gives your jaw a workout. Next time I won’t bake them as long! Once I’ve come up with a good basic bagel recipe, I’d like to experiment with different kinds of dough. Eventually I’d like to be able to replicate my favorite bagel from the local bagel shop — a sundried tomato spinach bagel. Mmm.

who cares about pita?

If I agreed with the title of a book I received for Christmas, I wouldn’t be posting this. According to author Margaret Mason, No One Cares What You Had for Lunch.”

I beg to differ.

I’m sure that somewhere out there, someone cares that I ate pita for lunch today. (You do, don’t you?) More than that, you might even want to know how I made it. If you’ve never considered baking your own pita, I highly recommend it. It’s even slightly entertaining… if you have an oven with a window. The flat dough puffs up and forms a pocket, just like a well-behaved pita should.

I know you’re not supposed to care what I had for lunch today, but I ate my fresh, warm pita with fresh, warm roasted red pepper hummus. Mmm. There are as many hummus variations as there are camels in Egypt, so I didn’t bother to write down my hummus recipe.

This whole wheat pita recipe is one I found online years ago and have modified slightly. Note: the oven temperature isn’t a typo. The hotter the better!

:: WHOLE WHEAT PITA ::

Ingredients:
1 1/4 c. warm water
1/2 t. sugar
2 t. active dry yeast
1/4 t. salt
2 1/2 – 3 c. whole wheat flour

Directions:

1. Place water and sugar in a large bowl and stir. Add yeast and stir slightly. Let rest for 5 minutes. Mix in salt and flour gradually.

2. Knead well for 5 minutes. Place the dough in a bowl and lightly coat it with oil. Cover with a cloth and let rise in a warm place for 30 minutes.

3. Preheat oven to 500 degrees. Divide dough into 8 balls. Roll out each ball to make 1/4-inch thick rounds. Lightly dust each side with flour by rubbing it with floured hands. Let rest covered for 20 minutes. Bake on ungreased cookie sheets for 5-8 minutes or until lightly browned.

how to pop popcorn

It has come to my attention that there are people in this world who don’t know how to pop popcorn. (Shocking, isn’t it?)

I’m not talking about yanking the plastic off a pack of microwave popcorn, placing it This Side Up, and pressing the popcorn button. Sure, that’s quick and easy, but I prefer to pop it the old-fashioned way — in a kettle on top of the stove.

Not only is the old-fashioned way a lot more fun, but a big bag of popcorn kernels is cheaper and more environmentally friendly than boxes of microwave popcorn packets. And if you pop it on the stovetop, you don’t need any special appliances — just a kettle, popcorn, oil, and a big bowl.

popcorn1.jpg

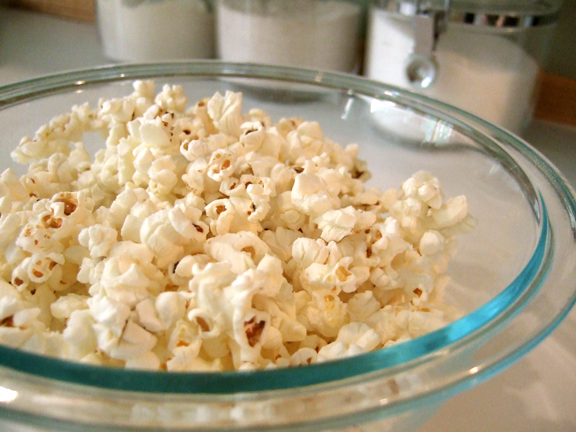
Think it sounds too complicated? It’s not. Here’s how you do it. Pour some popcorn (1/3 cup?) and some oil (1 tablespoon?) into a kettle over medium heat. Stir it with a spoon so that the popcorn is coated with the oil. Shake the kettle a bit so that the popcorn becomes evenly distributed on the bottom of the kettle. Cover the kettle with a lid. Get out a bowl and some salt if you haven’t done so already… because this is your last chance. When you hear the popcorn start to pop, move the kettle in a continuous circular motion over the burner so that the heat is evenly distributed. When the popping has almost completely stopped, remove the kettle from the heat and pour the hot popcorn into the bowl. Sprinkle with salt and enjoy!

popcorn2.jpg

If you burn it the first time, don’t be afraid to try again. Experiment with technique and quantity until you get the hang of it. And then try to resist the temptation to make it every evening…