Category: Crafting

lucky us

lucky us

Happy St. Patrick’s Day, friends! I think this is the first time I have ever hung up St. Patrick’s decor in my home. It’s not a holiday I really celebrate, except that I make sure to wear green and maybe buy a shamrock shake. But I recently made this simple “lucky us” banner and hung it on the wall in our stairway… and I love it.

It’s so easy for me to focus my attention on the challenges in my life, the things that are different than I wish they were, and the ways that I don’t measure up to who I want to be. But this “lucky us” banner serves as a little attitude check for me. It reminds me to be grateful for the wonderful things that those challenges represent. It reminds me to thank God for the blessings in my life. And it reminds me to look for the good in others and myself.

In a few days, I’ll probably be ready to tear off those shamrocks, but I think I’ll keep the rest of the banner up for a while. Because I can always use a sparkly little attitude check.

an adorable stuffed penguin

handmade penguin

Isn’t this the cutest penguin you’ve ever seen?! I bought the pattern for this penguin back in November, intending to give it as a Christmas gift. Then life got busyI set aside the half-finished penguin, and I ordered a set of Melissa and Doug blocks instead. I recently realized that spring was on its way, so I set a new goal of finishing the penguin before all the snow melts!

I finished sewing this penguin last night, and when my two-year-old walked into my crafting area this morning and saw the penguin sitting on a shelf, he laughed the sweetest little giggle as he ran to pick it up. As I write this, that brave little penguin is getting a first-hand look at what exactly Ethan does in his bedroom when he’s supposed to be napping.

This is the second stuffed animal I’ve sewn (the black sheep was my first), so I felt a bit more confident heading into this project. One sewing tip I’ve learned from the pattern designer, Abby Glassenberg of While She Naps, is the value of placing pins really close together when aligning curves. She recommends placing the pins 1/4″ apart, and while it may look a little crazy, it kept everything in place while I sewed.

pinning fleece on a curve

This year I’ve been blogging less than ever and pouring my creative energy into Instagram, but I think I’m ready to get back into the swing of blogging again. So to those of you who still follow my blog — thanks for sticking around! Good things are coming.

a friendship bracelet with hearts

heart friendship bracelet

Knotting a friendship bracelet is definitely not an efficient way for a busy mom to spend her time… but sometimes inefficient projects are good for the soul, especially on a snowy day! This sweet little friendship bracelet was the perfect project for a school day that started with a two-hour delay and ended with an early dismissal.

friendship bracelet embroidery floss

I originally learned to make knotted friendship bracelets when I was a kid at summer camp, but I relied on this tutorial to learn how to make a friendship bracelet with hearts. The process is more complex than the standard striped bracelet or even a chevron pattern, so if you’re taking care of three kids while you make one, you may need to untie some misplaced knots as you go…

heart friendship bracelet

How old does an object have to be before it’s considered “vintage?” I’m afraid my clipboard from high school might soon qualify!

heart friendship bracelet

This little heart friendship bracelet would be a fun Valentine’s gift to send your best friend since childhood — if you’re lucky enough to have one of those! Or maybe you have a tween daughter who would enjoy making one for her BFF.

If you make a heart friendship bracelet and share it on Instagram, feel free to tag me (@rachelswartley) — I’d love to see it!

an adventure to the Altitude Design Summit

business cards

Tomorrow morning I’m heading out on an adventure. It’s the kind of adventure that requires business cards and gold jewelry — a rare kind of getaway for a full-time mom. I’m heading to the Altitude Design Summit in Salt Lake City, which is a conference for creative bloggers and entrepreneurs.

I’ve been familiar with Alt since 2011, I think, and I’ve listened to keynotes online, followed the #altsummit Twitter feed, and gleaned as much as possible from other bloggers’ written recaps. Up until a few weeks ago, I expected this year to be the same — learning as much as I could from a distance. But on the day after Christmas, I won a ticket through a random giveaway on Instagram, and so this year I’ll be experiencing Alt first-hand.

There will be keynote speakers, breakout sessions, design camps, roundtable discussions, parties, sponsors, and more! And throughout the conference, each of us will be trying to show our best, most authentic self to the other bloggers, entrepreneurs, and brand representatives that we might want to collaborate with. It’s quite an event, and from what I’ve seen in pictures, the Grand America is quite a hotel.

Going to the Altitude Design Summit feels like a pretty big deal, so I’m both excited and nervous. I’m really good at comparing myself to other people and finding all the ways I don’t measure up. I have a blog, but I don’t post frequently. I’m active on Instagram, but I don’t have many followers. I love to make things, but there are lots of people who are far more creative than I am. I’ve sold a few things I’ve made, but it’s far from a full-fledged business. I can think of lots of reasons that I don’t belong at Alt.

So why am I going to Alt?  I’m going because I have a blog and I dream of selling handmade items. I’m going because I want to connect with and be inspired by other creative women. And I’m going because in spite of my self-doubt, I know I belong at Alt. (And, when you win a ticket to Alt, you don’t turn it down.)

business card

So ready or not, here I go! I’m packing up my handmade business cards, crossing my fingers, and heading out on an adventure. I’m sure I’ll be posting on Instagram more than usual, so feel free to connect with me there. I’m Rachel Swartley, and I’m creating a life I love.

a knock-knock joke birthday card

knock-knock joke card

I’d love to be the kind of aunt who sends cool cards and awesome little gifts to my nieces and nephews on their birthdays, but unfortunately, I’m the kind of aunt who rarely sends anything, and when I do, it’s usually late. In typical fashion, I created this card on the day after Simon’s 7th birthday. But instead of scrawling “Sorry this is late!”, I embraced the lateness and made it into a joke.

knock-knock joke card - inside

The classic knock-knock joke with the “orange you glad” punchline can easily be adapted to fit a variety of situations. In this card, we said, “Orange you glad we didn’t forget your birthday?!” Orange is Simon’s favorite color, so of course he got a kick out of it.

knock-knock joke card

I was aiming for a bit of a comic strip vibe, so I used the font SF Cartoonist Hand. The door knob is a brass fastener, although I suppose it would be more accurate to call it a brad, since it’s actually silver in color. You can find those at a craft store like Michaels.

Do you send birthday cards or gifts to your nieces and nephews who live at a distance? I have all of their birthdays on my calendar, but somehow they always seem to sneak up on me and I don’t get things mailed in time. If you send fun little treats (other than money), I’d love to hear your ideas!

why I said yes to making a custom order

wedding card box bunting

How do you decide which projects and ideas to say “yes” to? I have a hard time turning down a project that interests me, even when I don’t really have time to take on one more thing. So when a friend from high school reached out on Facebook and asked whether I would create a few decorations for her upcoming wedding, of course I said yes!

But as I sat hunched over my sewing machine, cranking out a 50-foot bunting, I wondered why I had agreed to do this! I could have been spending that time making something for myself or my family… or for our upcoming Summer Bible School at church.

So why DID I say yes?

1. It gave me an excuse to create. I love creating things, but I often find it hard to make it a priority when so many other things (and people!) are clamoring for my attention. In the daily routine, creative pursuits are a luxury, not a necessity. Dishes have to be washed, and diapers need to be changed, but I do not have to sew felt magnets for our play kitchen or design paper invitations for our annual summer ice cream party… although I feel happier when I do.

2. This was a paying project. As a full-time mom, I rarely get paid for anything I do, so the opportunity to work on a money-making project appealed to me. It’s been years since I’ve sold anything I made, but recently I’ve been dreaming about some new possibilities for selling handmade items, so it felt good to take on a paying project again.

3. It aligned with one of my goals for 2014. Six months ago, I was the happy owner of a Silhouette Cameo that intimidated me just a little, so when I developed my goals for the year, “learn to use my Silhouette Cameo” was on the list. I’ve used it quite a bit since then, but I knew this project would give me an opportunity to do some things with the machine that I hadn’t tried before.

wedding card box bunting

4. This was an unusual request. Her wedding decor is rustic and simple, but not the vintage, cottage-chic aesthetic that is all over Pinterest — they’re decorating mostly with orange, green, burlap and Realtree camouflage! The bride wanted me to create a few items to add some color in keeping with their theme, and I couldn’t resist the challenge of creating a little bunting to cover up part of the National Wild Turkey Federation logo on their wooden box for cards.

5. I was flattered to be asked. Obviously, this is NOT a good reason to say yes to something, but it does help tip the scale if I’m on the fence! When someone reaches out to me for creative assistance, it feels good to be able to help, especially when they are products that I’m very comfortable making.

bunting

As it turned out, the item the bride originally requested was not one of the three items she ended up needing. I made the little bunting for the card box, a 50-foot bunting for the reception in a barn, and 850 pieces of 1-inch confetti shapes for the tables. And I’m glad I said yes.

stamped paper table runner

hand-stamped paper table runner

A long table runner for a big Thanksgiving dinner doesn’t have to cost more than the turkey! This 14-foot table runner is simply a strip of kraft paper I cut from a big roll. Two years ago, it survived Thanksgiving dinner without any cranberry stains on it, so I saved it to reuse in the future — and this year I decided to fancy it up a bit.

The hand-stamped leaves were completely inspired by this table runner you can purchase from Minted. The leaf motif is very similar to this one (there’s a printable pattern!), but I drew my own by hand on an index card.

I bought a thick sheet of craft foam at Joann for $1.49 to use as my stamp. I traced around my paper pattern with a permanent marker, cut out the foam shape with an X-Acto knife, and glued it to a piece of sturdy foam core for stability — and to give me something better to grip. Michaels only carries thin sheets of craft foam, so if you can’t find thicker foam, you can just cut out several identical versions of your stamp from thin foam and stack them together.

cut your own stamp from thick craft foam

Then I just grabbed a white stamp pad and stamped away! I used Frost White pigment ink by Color Box because that’s what I had on hand.

hand-stamped paper table runner

I love how the table runner turned out, and I’m already dreaming of other simple stamps I can make with the rest of the sheet of foam. Oh, and those candles are fragrance-free soy candles I made in my crock pot. I’ll be sure to get any little wax bits out before I fill it with mashed potatoes next week!

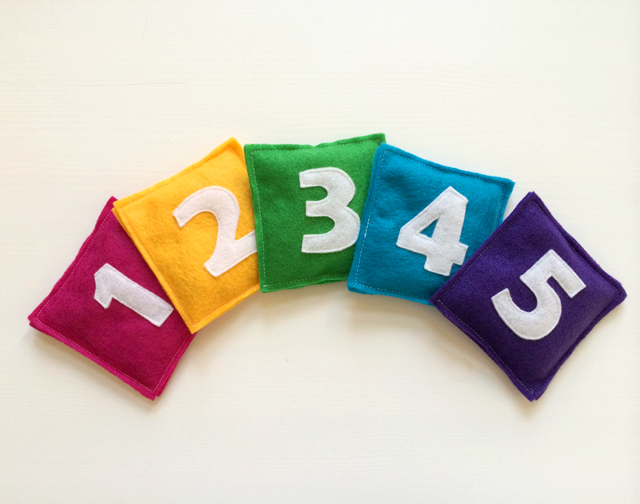
numbered felt bean bags

numbered bean bags

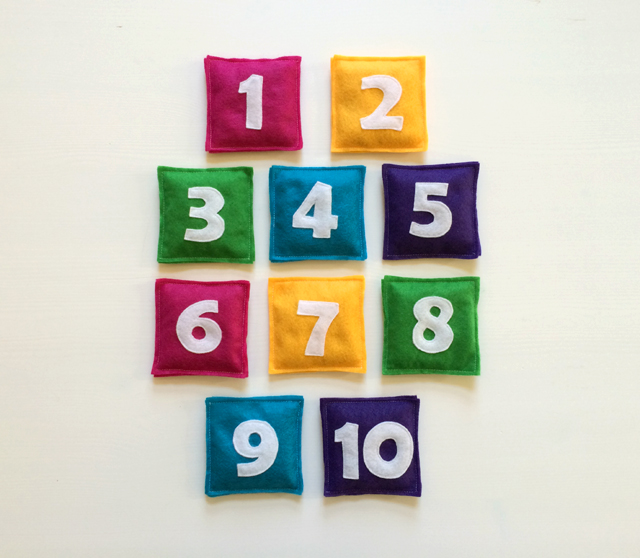
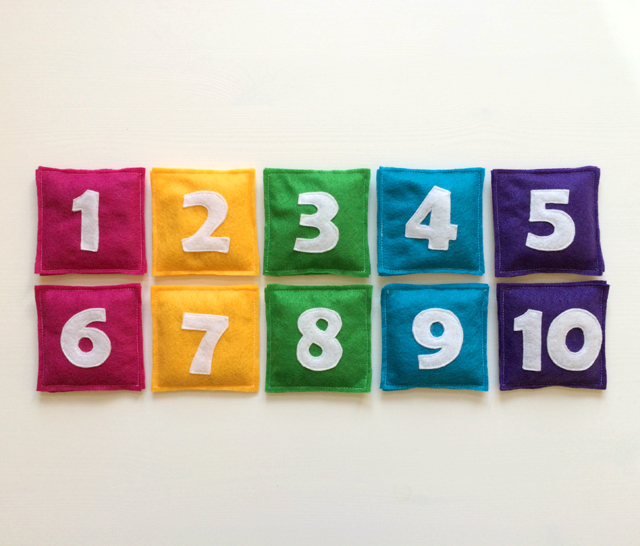
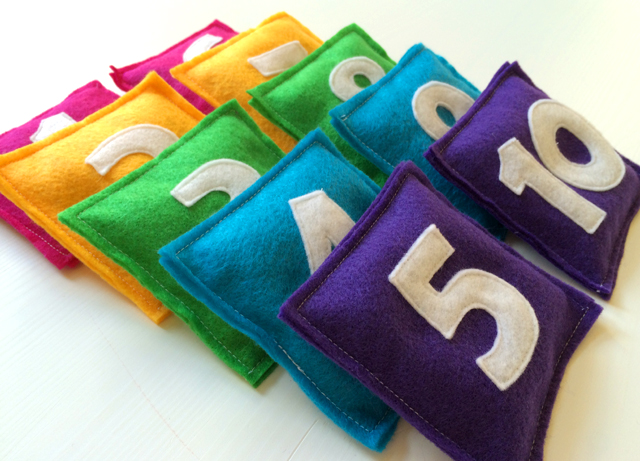
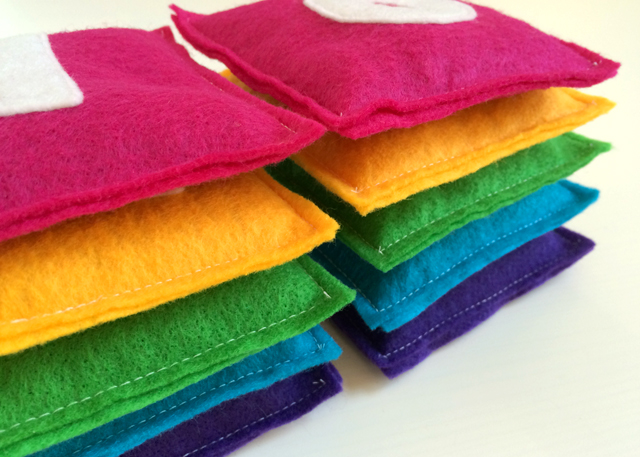
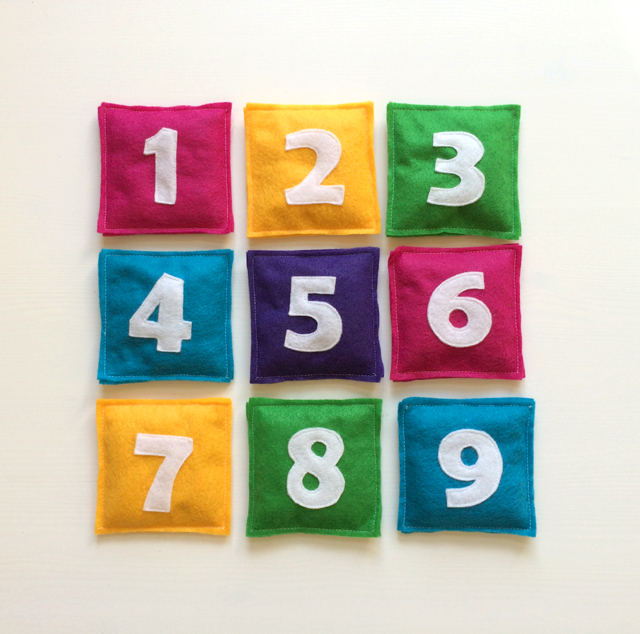
Probably every mom with a sewing machine has made bean bags for her kids. Am I right? This project certainly isn’t original, but these brightly colored felt bean bags were fun to make — and even more fun to show Ethan when he woke up from his two-hour (!!!)  morning nap.

numbered bean bags

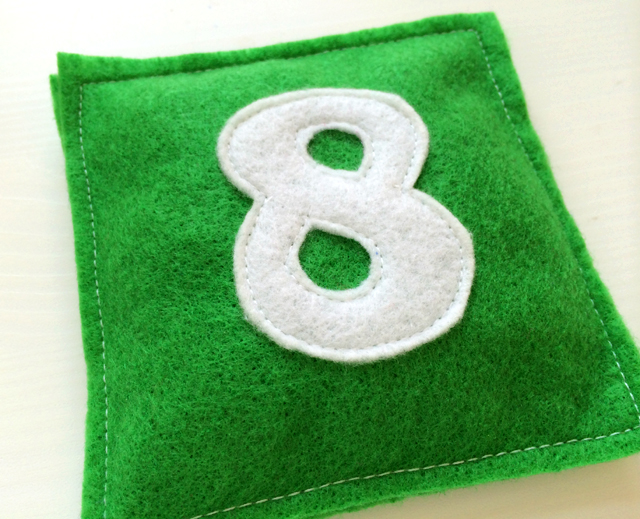
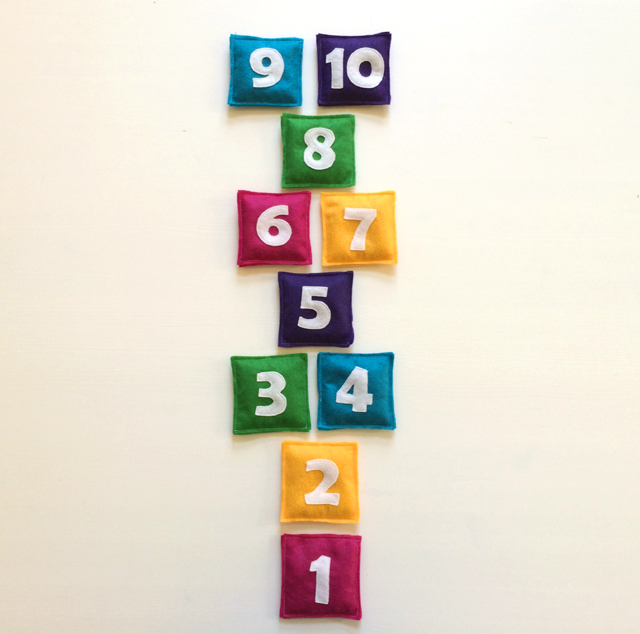
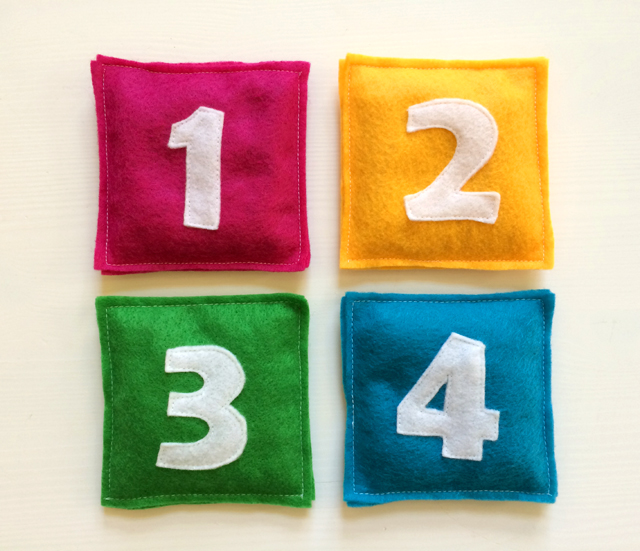
I followed this tutorial for tracing and cutting out my felt numbers, and it was so easy! Then I stitched the numbers on, sewed and filled the beanbags, and did a surprisingly fun photo shoot. I couldn’t stop arranging the bean bags in new ways!

The bags are made from 4×4-inch squares, and the font I used for the numbers is Berlin Sans FB Demi Bold. If you want to make your own, you can download and print this PDF to use as the pattern for your numbers.

numbered bean bags

The ideas for games and activities we can do with these bean bags are endless. Of course my two school-age step-children will do different things with them than my 11-month-old son will, but I’m eager to see what they all come up with.

numbered bean bags

numbered bean bags

numbered bean bags

numbered bean bags

numbered bean bags

numbered bean bags

numbered bean bags

numbered bean bags

numbered bean bags


giant canvas alphabet art

giant painted canvas alphabet art

My baby sleeps in an IKEA crib, keeps his clothes in an IKEA dresser, and gets his diaper changed on an IKEA shelf. But little by little, the bedding, artwork, and other decorative items in his room are being lovingly handcrafted by his mama.

This giant canvas was a deeply-discounted impulse purchase at Michaels back in 2011. I had no idea what I would paint on it, but for twenty bucks, I couldn’t resist buying a blank 3-by-4-foot canvas. The man behind me in line was convinced I was a painter (who else would buy such a huge canvas?), and even though I denied it several times, he persisted and even asked if I do commissions. Ha! He must have thought I was being modest, but I was being honest. I don’t paint!

Fast forward two years, and this giant canvas now hangs on the wall of Ethan’s bedroom, adding a big, bold splash of color. I still would never call myself a painter, but I did successfully paint the alphabet onto a canvas.

handpainted canvas alphabet art

Here’s how to make your own painted canvas alphabet art:

STEP 1: Design the artwork.
I created an image in Photoshop Elements, moving and resizing the letters until I was satisfied. I wanted ultra-bold letters, so I used a free font called Bemio. This is also when I decided which color to paint each of the letters and which ones should be on top when they overlap.

STEP 2: Convert your design into a traceable pattern.
I hate to say it, but this step was clunky. If you have access to a video projector, just project the image onto your canvas, trace the outlines of the letters with a pencil, and continue to step 3. If you don’t, you can do what I did.

I added black outlines to my letters in Photoshop, then hid the colorful letters. (If you don’t know how, try following this quick tutorial.) I then divided my large image into 28 smaller 8×10″ images by selecting/copying a portion of the original image and creating a new image from the selection (File > New from Clipboard). I printed out those 28 images onto 28 sheets of white 8.5×11″ paper and then taped them together to make one large image. It’s not difficult, it’s just repetitive and somewhat annoying.

If you prefer, you could also have a 36×48″ image printed as an engineering print at Staples, but that would have cost more than $7, and that seemed too expensive for an intermediary step in a project. However, your sanity may be worth it.

STEP 3: Trace your design onto the canvas.
Now that you have a large, unwieldy, taped-together paper with your pattern on it, lay it on top of your canvas, center it up properly, and tape it directly to the canvas in a few places. Slide a sheet of graphite transfer paper between the pattern and the canvas. Use some kind of stylus (or pencil) to trace the outline of each letter, pressing firmly as you go. Depending on the size of your transfer paper, you’ll need to move it at least a few times as you trace. Try hard not to shift the big paper pattern on top!

STEP 4: Paint!
Finally, the step you’ve been looking forward to the most! Paint the letters! I used a 1/2-inch wide flat brush and four different colors of acrylic paint. I saved a picture of the design on my phone so I could refer to it often while I painted the first coat. Not only did I need to see which colors to paint the letters, but I had to keep checking how the letters overlapped, since I had traced the complete outline for each letter. I ended up painting two coats of most colors and three coats of the navy blue.

The paint colors (and brands) I used are Laguna (Apple Barrel), Real Navy (Apple Barrel), Citrus Green (Folk Art), and Neutral Gray (Americana). The colors coordinate with Ethan’s quilt… which is currently a stack of triangles stitched together to make squares.

STEP 5: Outline your letters.
I wasn’t originally planning to do this, but the edges and corners of the letters weren’t always as crisp as I would have liked, and I thought the added definition would help. It was absolutely the right decision for my project. I used a 1/8-inch flat brush to outline the letters in black.

STEP 6: Seal your painting with ModPodge.
I accidentally bought glossy navy blue paint, which was very obviously different from the other paints, so I brushed a coat of ModPodge over the entire canvas to even things out. I’d recommend this even if all of your paints have the same finish — it gives the project a nice finished look.

The canvas has been hanging in Ethan’s room since Saturday, and I’m still afraid I’m going to look at it one day and realize that I missed a letter. I didn’t, did I?


pentominoes melty bead puzzle

perler bead puzzle - pentominoes

Every time I see my kids’ big container of 11,000 Perler beads sitting on the shelf, I keep thinking that there must be something useful I could make with them. But it also has to look cool and not like I’m looking for an excuse to use these beads (ha!) — so that rules out coasters, bowls, and Christmas ornaments. When I saw these Tetris magnets the other day, I had an “aha!” moment.

So I combined my love of puzzles with my love of crafting and made a functional pentominoes puzzle out of these colorful little melty beads.

perler bead puzzle - pentominoes

Pentominoes look a lot like Tetris shapes, but each piece is made from five squares, rather than four. The pieces of the puzzle are the twelve shapes that can be made by joining five squares together. If you’re making your own, these are the twelve puzzle pieces you will need to make.

perler bead puzzle - pentominoes

The finished size of the puzzle is 2.5×4″, and requires 240 melty beads. I made each square out of four beads, but if you or your child finds that the small pieces are too difficult to work with, you could make larger pieces with nine beads per square. This would use 540 beads and would take much longer to make. You would also need a larger bead tray in order to create the long straight piece. (The standard square tray is 14 pegs long.)

According to this site, the 6×10-square pentominoes puzzle has 2,339 solutions, but coming up with just one of those solutions might be more challenging than you’d expect!

perler bead puzzle - pentominoes

To keep my puzzle to the 6×10 shape, I made a little foam core box for it. I used 3/16″ foam core, which just so happens to be the same depth as the puzzle pieces.

foam core puzzle box

I attached the sides of the tray with craft glue, and then attached the lid to the tray with a couple layers of clear packing tape.

foam core puzzle box

When I was a kid, we had a version of this game called Hexed, and my mom was wise enough to draw off the solution before we took it out of the box the first time. If we couldn’t solve the puzzle, we could always just pull out the solution so we could fit the puzzle back in the box.

I printed off a picture of the completed puzzle and slipped it into a paper sleeve that I glued to the lid of the box. Of course, this is just one of many possible solutions, but it guarantees that my kids will be able to put the puzzle away properly!

perler bead puzzle - pentominoes

Here’s one solution to the puzzle, but there are 2,338 more!

perler bead puzzle - pentominoes

If you make your own pentominoes game, I’d love to see it! Either leave a comment with a link, or send me an email.

perler bead puzzle - pentominoes

And if you want to play but don’t want to create your own game, you can either buy a set (just google “pentominoes”) or play online. Have fun!

you are so loved

you are so loved

The timing of this afternoon’s power outage couldn’t have been more perfect for me. My older two kids were still at school, my baby was ready to be nursed and put down for a nap, and I had a burst of creative inspiration.

you are so loved

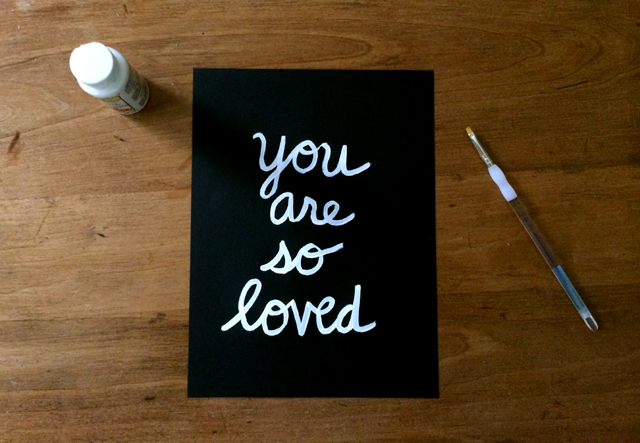
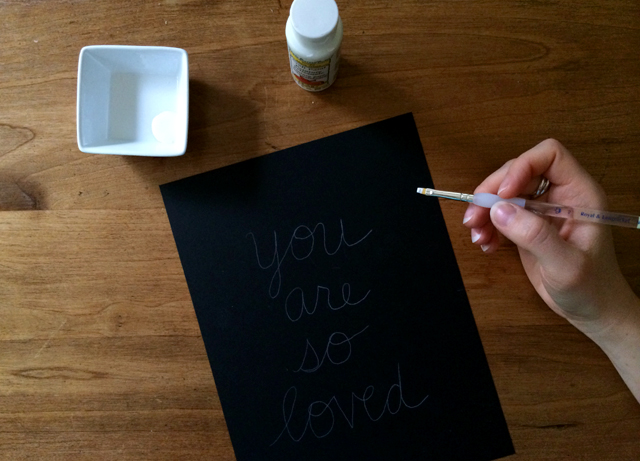
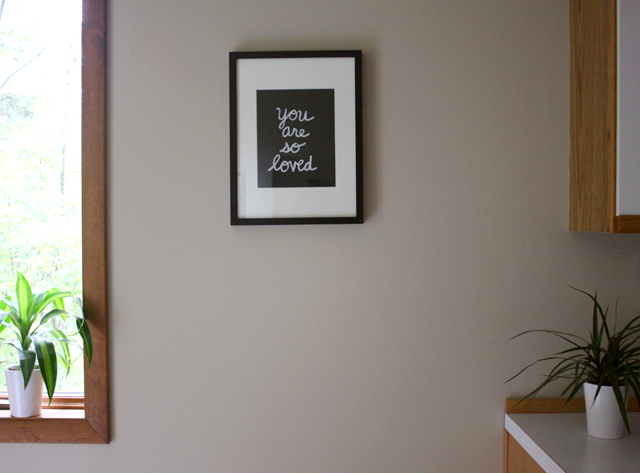
I’ve been wanting to create some new art for our walls, so I decided to embrace the “done is better than perfect” mantra and just go for it. I sketched out the phrase “you are so loved” onto white paper until I was satisfied with it, then traced it onto a sheet of black paper with white transfer paper. Then I just painted over the lines with white acrylic paint, framed it, and — right after the power came back on! — hung it in our dining room.

you are so loved

It’s not perfect, but neither are any of the people I love. And I love them anyway.

a sparkly birthday party

sparkly birthday party invitation

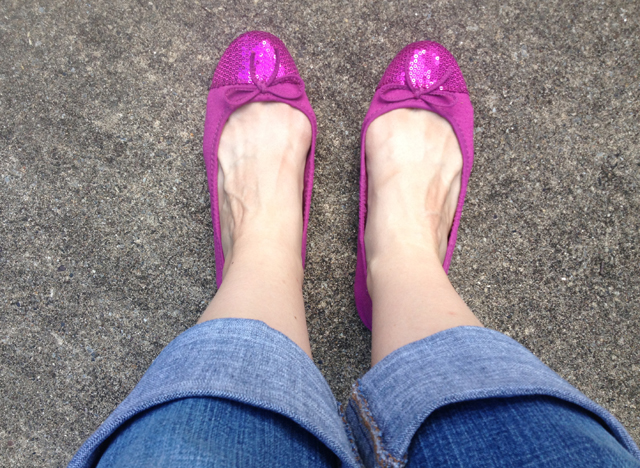
Have you ever hosted a party with a dress code? I have! For Magen’s 10th birthday party earlier this summer, the invitations specified what the attendees should wear: anything sparkly! Because what girl doesn’t love sparkles? I even got in on the sparkly action with some sequin shoes that I bought on extreme clearance a few years ago… just in case I ever needed them.

sparkly sequin shoes

The sparkle theme was inspired by a sheet of holographic foam core that Magen wanted me to use for her double-digit birthday photoshoot. Two years ago, I started a tradition of cutting out giant numbers to use for a birthday photoshoot, and this year’s was the easiest, because I didn’t even have to paint the numbers. (Here are the amateur 8, the greatly-improved 9, and Hayden’s soon-to-be-retired six.) The main photoshoot was with the birthday girl and her friends, but unfortunately I can’t post them here, so you’ll have to use your imagination.

birthday photoshoot

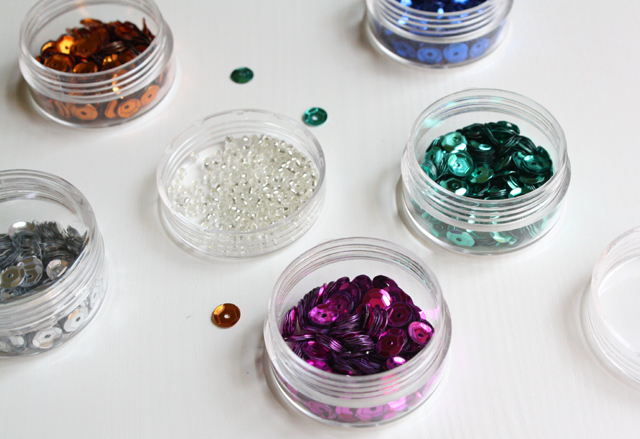
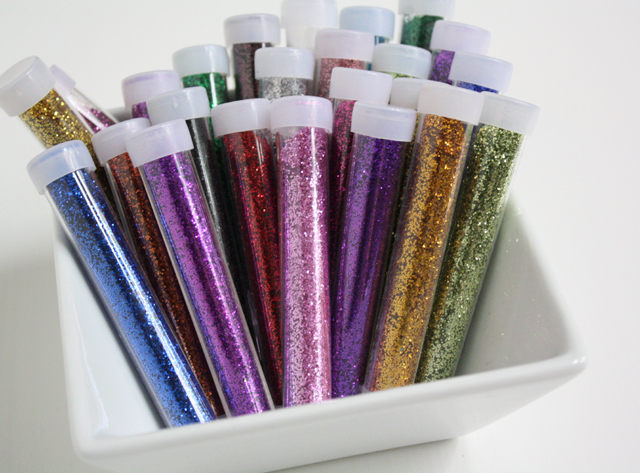
Instead of games, this year we did sparkly crafts with sequins and glitter. I’m not sure if that makes me brave or crazy, but I’m very glad we didn’t have any glitter mishaps!

sequins

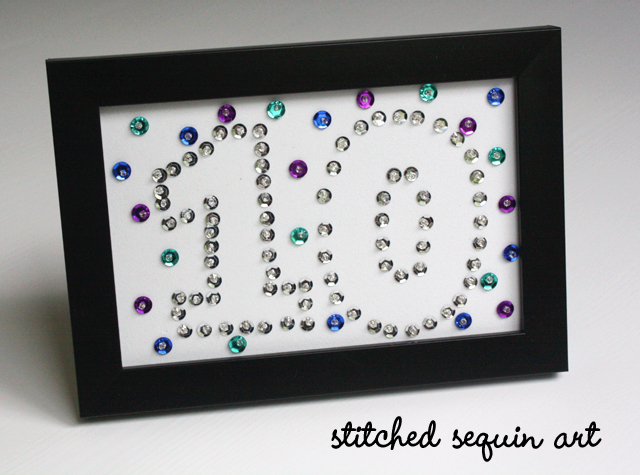
Each girl designed and stitched her own framed sequin art. I bought a bunch of small black picture frames from Target and cut sheets of white craft foam to size. The girls used colorful sequins and clear seed beads to decorate their foam, attaching them with thread and a beading needle. Perhaps someday I’ll write up a good tutorial, but basically the thread comes up through the sequin and the bead, and then goes out over the edge/side of the bead and back down through the sequin. It’s more complicated than gluing the sequins on, but it holds them in place very securely — and the beads give it some extra dimension. This is the sample I made for the girls. It’s not perfect, but you get the idea.

stitched sequin art

The glass is behind the foam, so the frame can easily be used for a photograph again when we get tired of the sequins… or more likely, when she’s no longer ten years old.

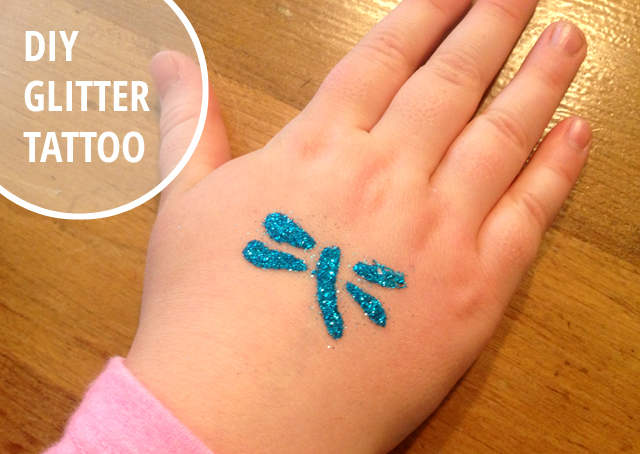
The girls also made their own glitter tattoos inspired by this tutorial. They cut their own stencils out of contact paper and adhered the stencil to their skin. I then brushed on Elmer’s glue with a paintbrush, removed the stencil, and sprinkled the glitter onto the glue.  So cute!

DIY glitter tattoo

glitter

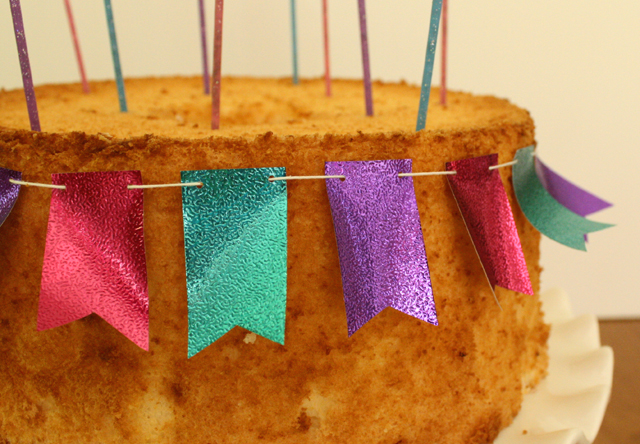
I love that Magen always wants angel food cake for her birthday, because it’s so easy to decorate! I made a little bunting out of shiny foil wrapping paper that I bought at the dollar store and added 10 tall, glittery sparkler candles.

angel food cake bunting

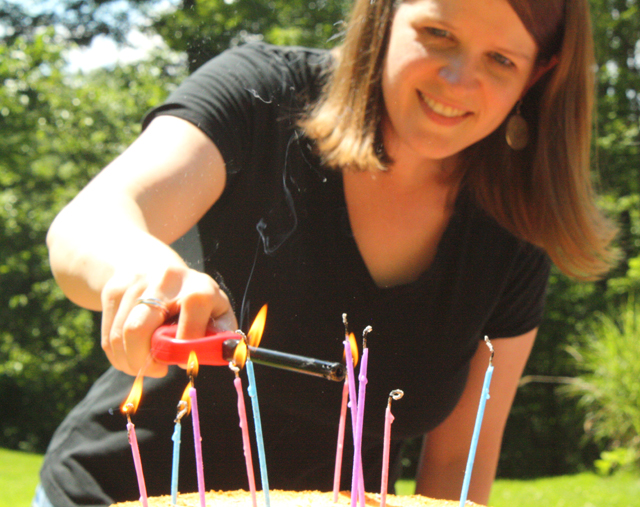
Sparkler candles are tricky! Due to the fumes, it’s best to use them outside, but then the wind is a problem!

lighting sparkler candles

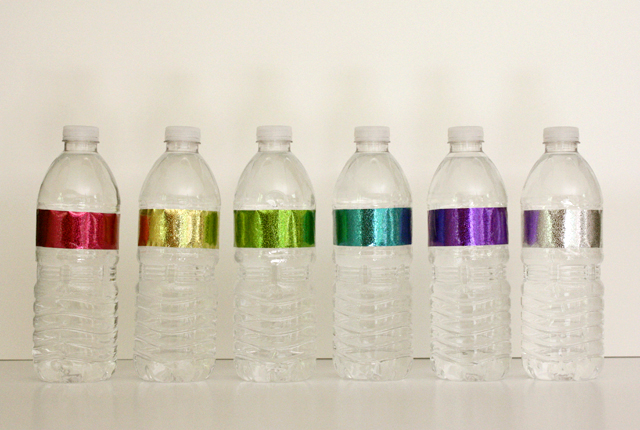
The shiny paper that you saw on the invitations and the cake bunting also made fun colorful labels for the water bottles. I removed the original labels and attached my new labels with clear packing tape. Excessive? Maybe. But the girls even took their water bottles home with them at the end of the party, so I’m pretty sure they loved it.

sparkly water bottle labels

And of course, no sparkly party is complete without sparklers! It was daytime, so the sparklers didn’t have the same visual effect as they would have had at night, but the girls had fun lighting the sparklers in the middle so that they burned in both directions!

I considered having a water balloon fight with a bit of glitter inside each water balloon, but decided against it for two reasons — (1) it’s a lot of work and (2) the glitter that would have stuck to the girls’ clothes would have ended up in our house and in their parents’ cars. Maybe someday!

Do you have any favorite ideas for sparkly crafts? We have lots of glitter and sequins left over, so I would love to hear your ideas!

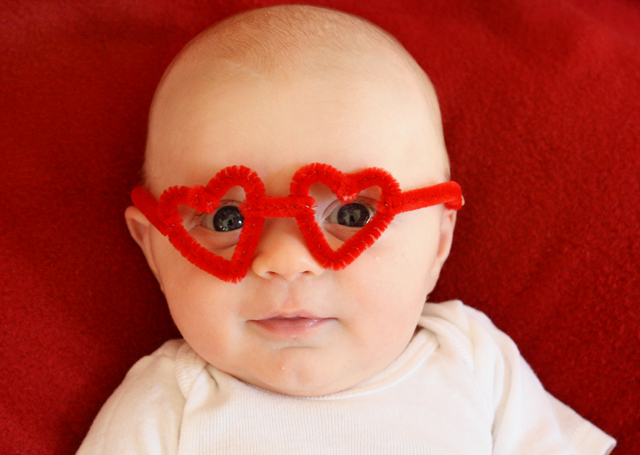
my littlest Valentine

heart-shaped glasses made from pipe cleaners

Happy Valentine’s Day!

Inspiration for the heart-shaped pipe cleaner glasses found here. I put a tiny dab of hot glue on each of the sharp ends of the pipe cleaners for safety.

mini heart bunting card

paper heart bunting card

Last weekend I assembled an IKEA Expedit shelving unit for storing all of my craft supplies. It was originally intended for Ethan’s room, but the construction of his room took so long that I found a different use for it meanwhile! We’re just waiting for the carpet to be installed now, so I guess I’ll need to make another trip to IKEA soon. Poor me…

While I was gathering all of my craft items into one place, I came across some scraps of paper left over from the paper flag bunting and the mini bunting cards I made last summer. So I used some of those colorful little scraps to create a very similar bunting card, but this time I made the bunting with tiny hearts instead of triangle flags.

I punched out two hearts of each color and glued them together with a string between the layers. If you make a card like this, I recommend gluing the hearts to your string before you tie it to the card. I tied the string to the card first and I almost ran out of room! And actually, if you glue the string on the hearts before tying it to the card, then you can just use one heart of each color, which would be easier.

I only made one of these little cards, and don’t plan to make another. But hopefully one of you will benefit from my hindsight!

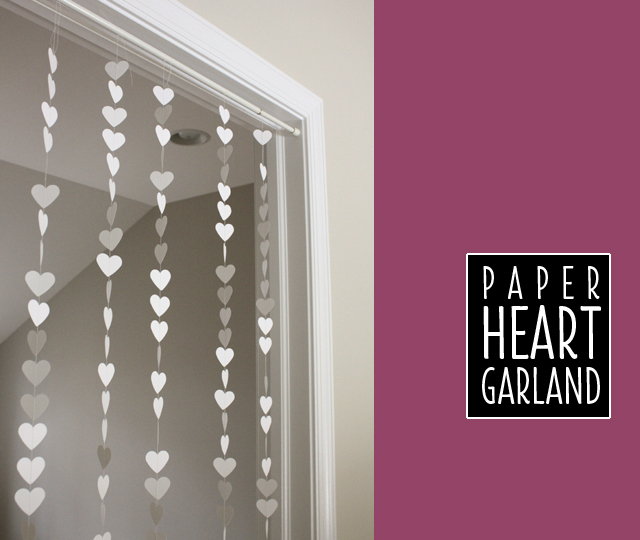
white paper heart garland

white paper heart garland

Paper is my favorite material to create with, and white is my favorite color (even though it’s technically not a color!), so of course I had to make some Valentine’s decor with white paper. This simple paper heart garland was made from four sheets of white cardstock and some white thread. I punched out the hearts using the same punch I used for the framed paper heart art I shared with you the other day. Then I stitched up five strands of 35 hearts each with my sewing machine and tied them to a tension rod.

If it looks like the room behind those hearts is empty, you’re right! Once the carpet is installed in our brand new room, then we can put furniture and little Ethan in it. Can’t wait!

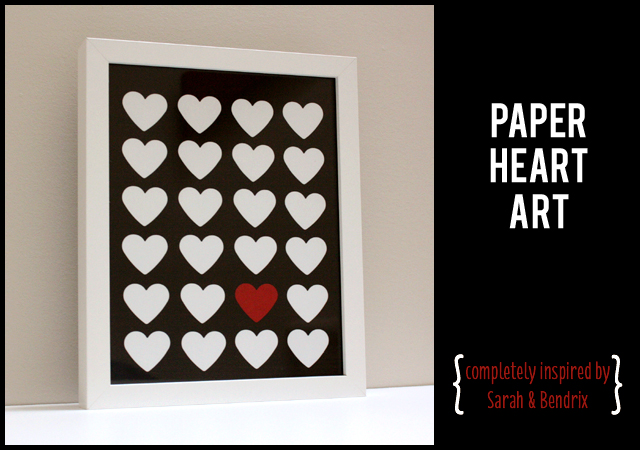
paper heart art

paper heart art

Can you believe that Valentine’s Day is next week? I feel like we just celebrated Christmas, and now another holiday is just around the corner!

A few years ago I discovered the folded paper heart art made by Sarah and Bendrix, and I’ve been wanting to make something similar ever since. Their white-on-white art is very sophisticated, but I thought my kids would enjoy something with more contrast. So last week I punched out a bunch of white paper hearts (and one red one!), glued them to an 8×10 sheet of black paper, and stuck the completed project in an IKEA Ribba frame.

Our baby boy was born a few weeks before Christmas, so I didn’t do any Christmas crafting in December. Now that the pain of my pregnancy-induced carpal tunnel has mostly gone away, it feels good to start creating things again!

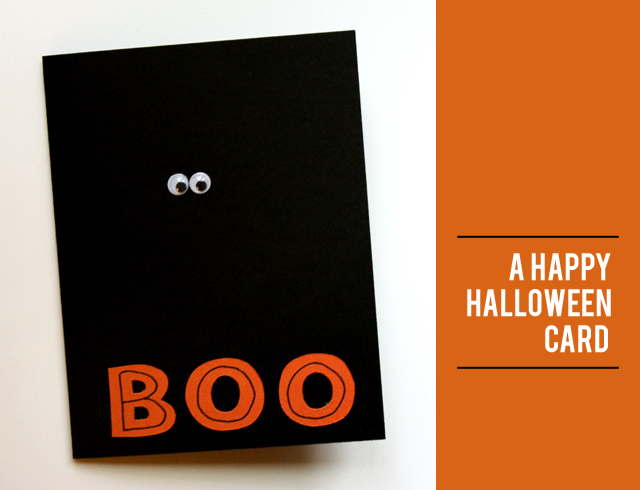
BOO: a happy halloween card

BOO: a happy halloween card

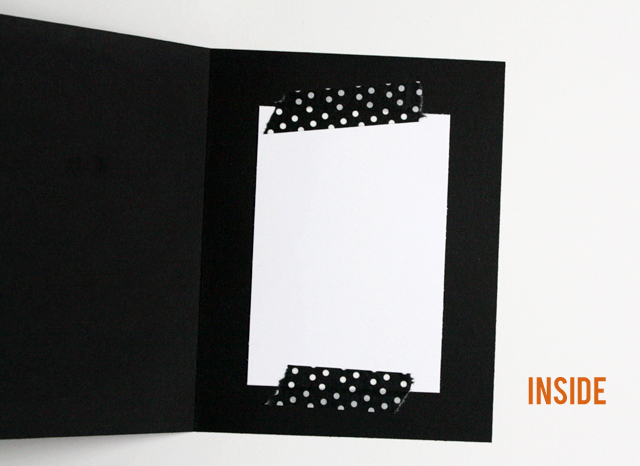
I love most holidays, but I’m not a big fan of Halloween. Costumes and jack o’ lanterns are fun, but witches and skeletons and cobwebs just aren’t my thing. But last night I was craving a quick creative outlet, and came up with this happy little Halloween-themed card. I just cut out the word BOO from orange card stock, glued the letters and two wiggle eyes onto a black card, and taped a white insert to the inside for writing a little note.

BOO: a happy halloween card (inside)

BOO!

balloon birthday cards

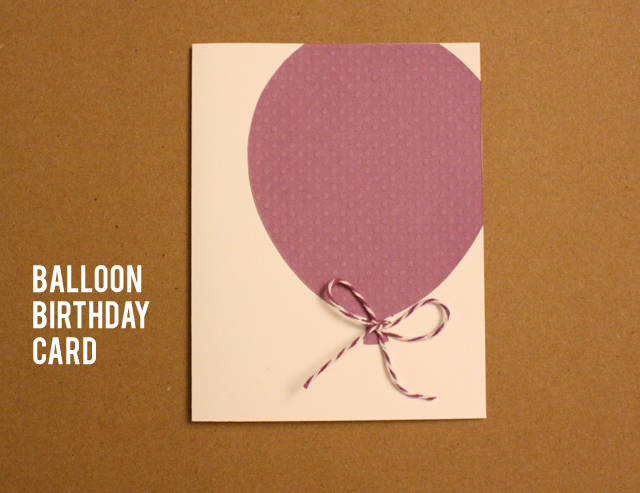
balloon birthday card

Since August of last year, I’ve been one of the leaders of the Girls’ Club at our church, which means I plan monthly activities for a fun group of third, fourth, and fifth grade girls. This school year, I’m sending birthday cards to each of the girls when their big day rolls around. I already sent the first card a few weeks ago, and then I created a bunch more last week so that my cards are all ready to be personalized and written in throughout the year.

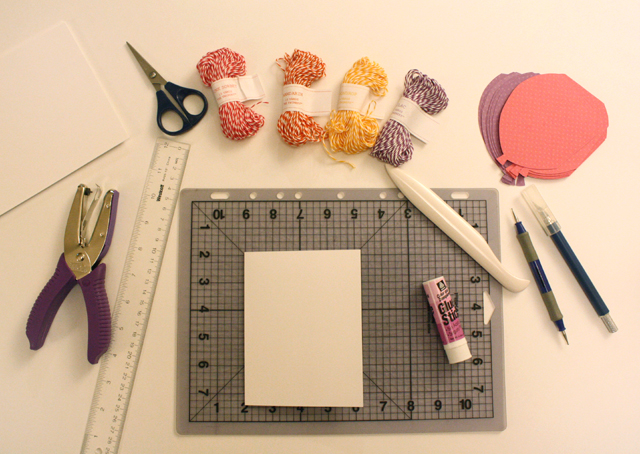
balloon birthday card - cardmaking supplies

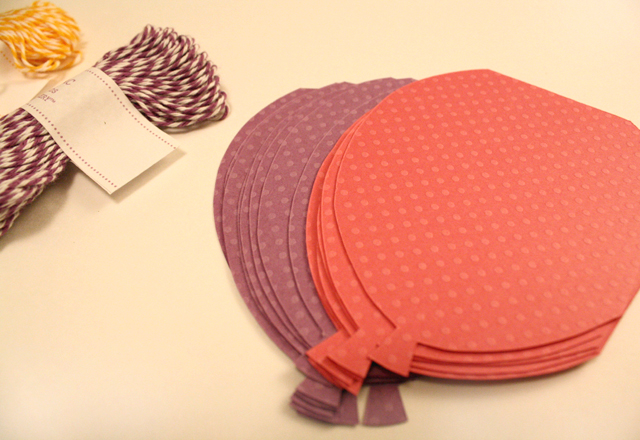
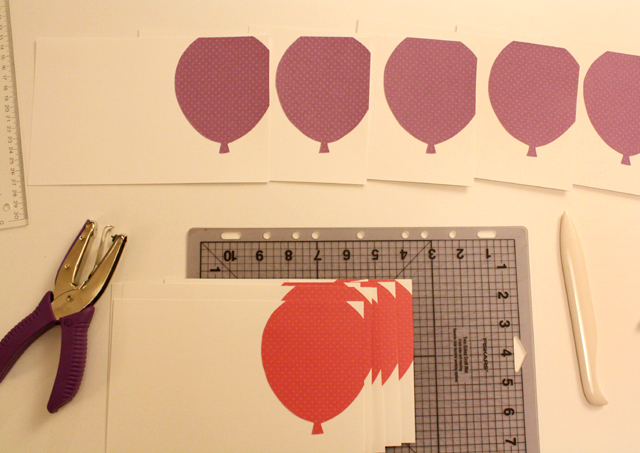
I cut the balloon shapes from textured polka dot paper made by Bazzill Basics (on sale at Michaels).

balloon birthday card - paper balloon cutouts

I glued each balloon to a piece of white cardstock that I had already cut and scored for folding.

balloon birthday cards - in progress

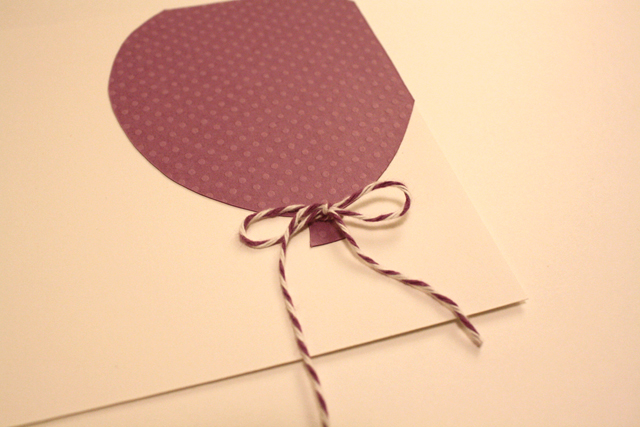
Next I punched a tiny hole on each side of the “knot” part of the balloon and slipped a piece of bakers twine through the holes. (The twine is from The Twinery.) I still haven’t learned how to tie a bow that really looks right, but I fiddled with each of these until they looked good enough.

balloon birthday card - bakers twine

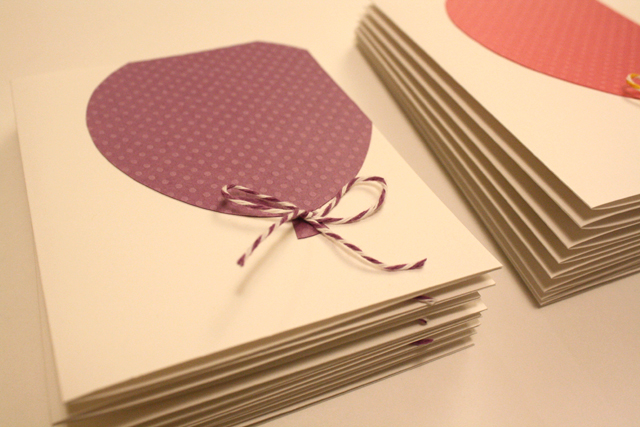
All stacked up and ready to be personalized!

balloon birthday cards stacked up

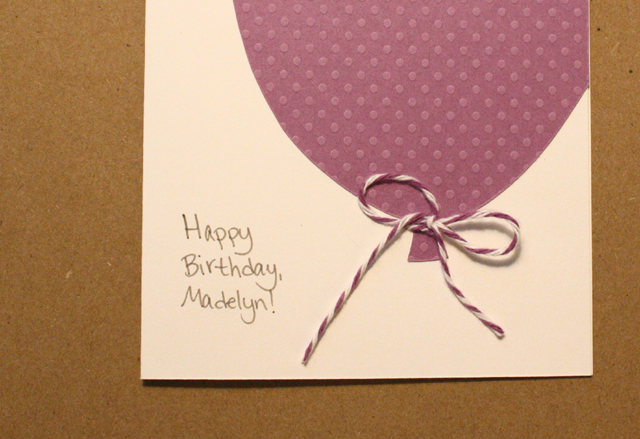
Madelyn’s birthday is next!

balloon birthday card - personalized

My bow-tying needs a little help, doesn’t it? Can you tie a perfect bow? If so, please tell me how it’s done!

40 Things I Love About You mini-book

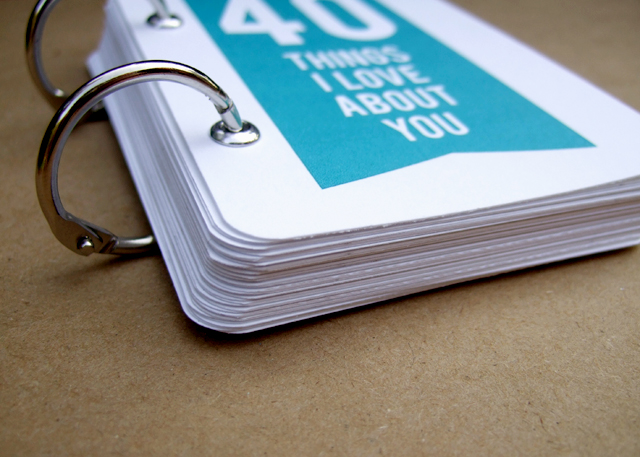
When my husband hit the big four-oh a few weeks ago, I presented him with a little gift that combined two things I’m obsessed with: the man himself… and paper.

minibook - 40 Things I Love About You

I created a 40-page mini-book for Tim called “40 Things I Love About You.” I cut the pages from white cardstock (3×4″), rounded the corners, punched a couple grommets in the cover, and held it all together with two metal book rings. Then I got out a pen and filled the pages with things I love about Tim.

It was easy.

minibook - 40 Things I Love About You

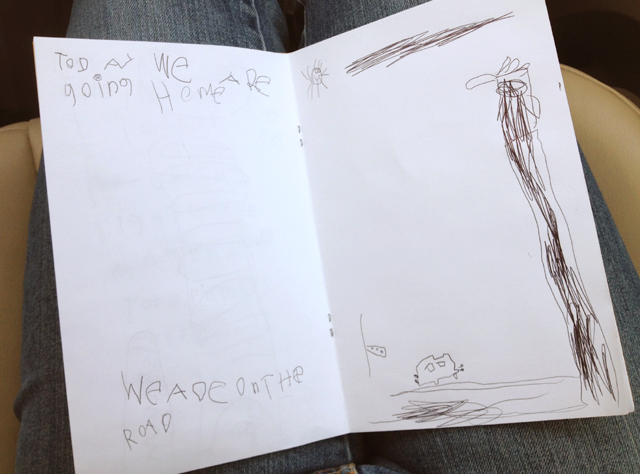
handmade vacation journals

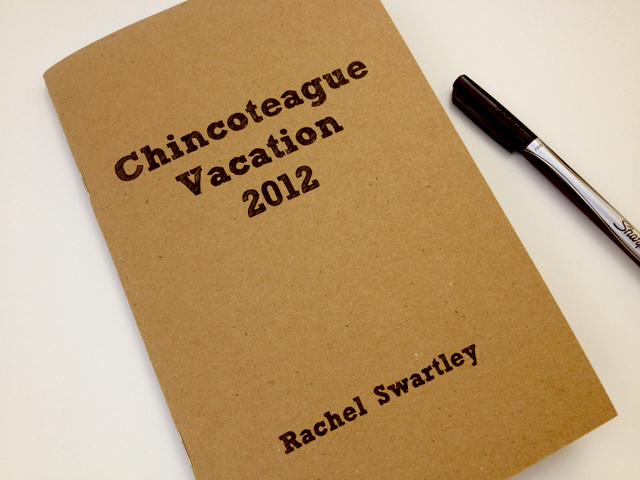
One of the best things I did to get ready for our week of vacation this summer was make vacation journals. The night before we left, I decided that we should have a way to record our memories throughout the week, so I made journals for each of the kids — and then made one more for myself.

handmade vacation journal

I printed our destination and the year on a sheet of cardstock and stapled it together with six sheets of white paper. Then I folded it in half and called it done. It wasn’t fancy… but it was the night before we left.

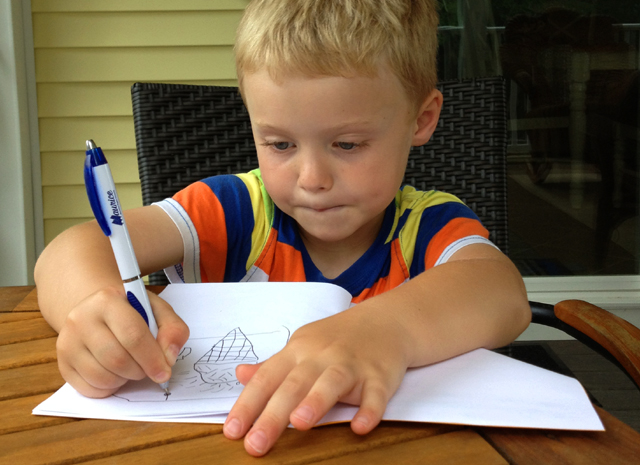
The kids and I had a great time writing in our journals during the week — and they also enjoyed drawing pictures of some of our activities, like eating ice cream at Mister Whippy.

handmade vacation journal writing

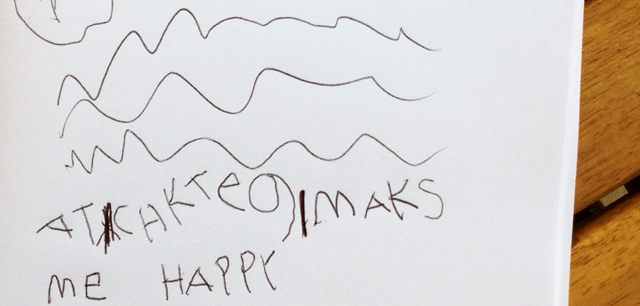
We wrote about the places we went, the food we ate, and how we felt about being on vacation — from the first day…

handmade vacation journal first day

… to the last.

handmade vacation journal heading home

And while I was looking through our vacation photos to find these pictures, I decided to finally print out a bunch of photos from our trip to put in a big collage frame in the hallway. Great vacations are worth remembering often!

snapshots from a soccer birthday party

There are plenty of blogs out there that feature birthday parties with creative themes, amazing decorations, exquisite styling, and professional photos of the happy event. This isn’t one of them.

When I host a party, I’m usually so busy getting everything set up that I feel lucky to find a moment to take pictures before the guests arrive. So here are just a few very basic snapshots of the soccer-themed birthday party we hosted in our backyard to celebrate our happy six-year-old.

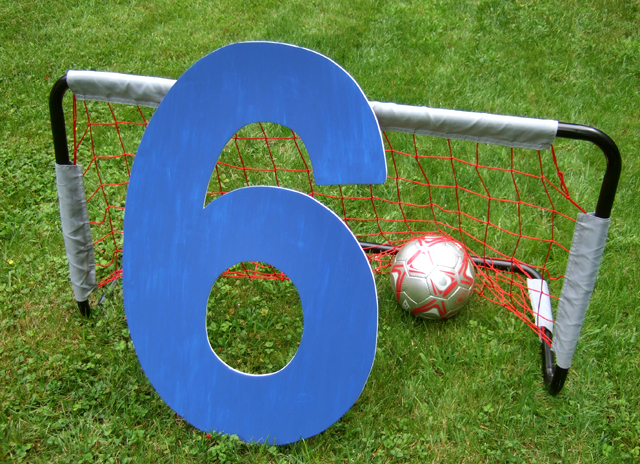
soccer birthday party with large number six

Doing a photoshoot with a giant number has become a tradition at our kids’ birthday parties. It only costs a couple bucks to make (I stock up on foam core at Michaels when it’s 50% off), and then we use the large number in their bedroom as a big, fun decoration until their next birthday rolls around. They love it and so do I.

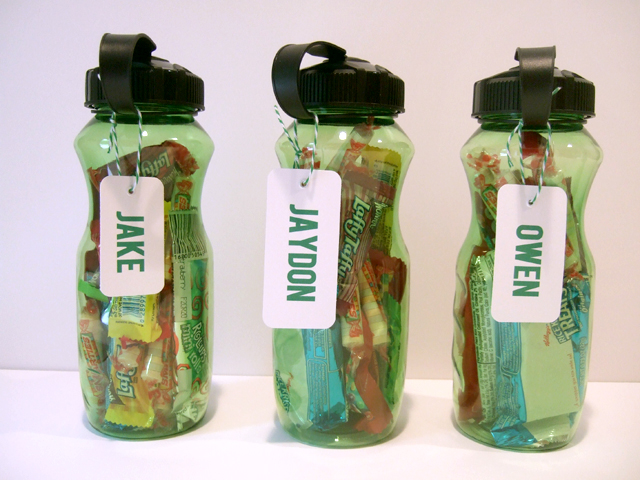
The kids always ask me to create a treasure hunt, so I made a photo-based treasure hunt for the gang of energetic little boys who are still learning to read. For the hidden treasure (which doubled as the party favor), I bought a reusable water bottle for each kid, filled it with sweet treats, and strung up a tag with each boy’s name on it so they didn’t accidentally eat each other’s Skittles.

soccer birthday party water bottle favors

My favorite little detail for the party was the cupcake topper I created — and I was so proud of myself for planning ahead and making them a whole week before the party. Ha! I found a soccer ball graphic on the internet and designed a simple number six in a circle for the opposite side of the cupcake topper. Then I just cut them out with a circle punch and glued them together with a toothpick in between.

soccer birthday party cupcake toppers

Another summer, another round of family birthday parties complete!

a lovely outdoor summer wedding

Our family enjoyed the most lovely outdoor wedding last weekend at a farm in the hills of New Jersey.

wedding on a farm in New Jersey

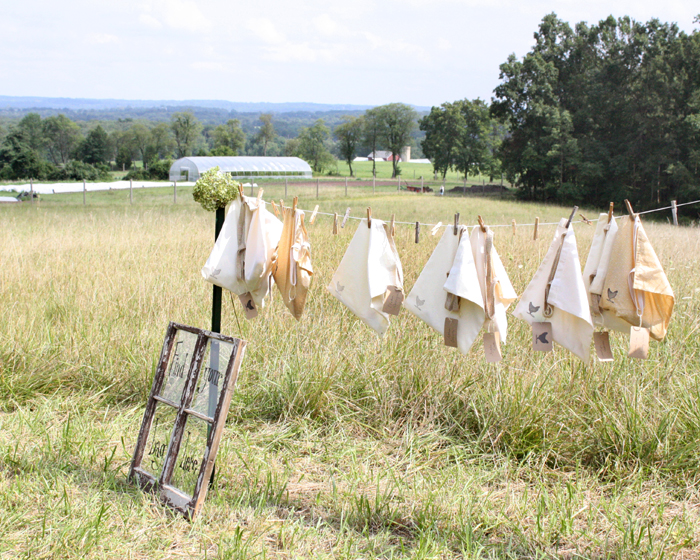
When we arrived, we were greeted by a clothesline full of handmade tote bags with treats for each family — trail mix, homemade fruit leather (strawberry rhubarb and apricot lavender!), kazoos for the ceremony recessional, and sparklers for the part of the festivities we missed because we have children who needed to get home to bed.

handmade wedding tote bags

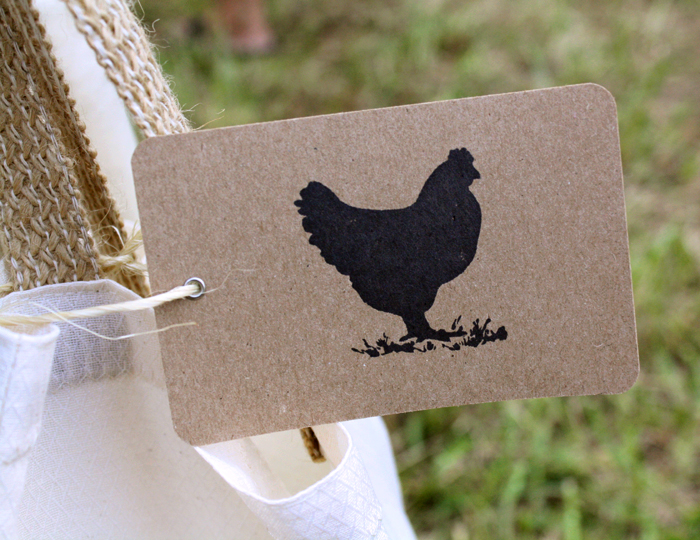
Each tote bag was stamped with a chicken and was strung up with a tag that featured the same motif and the names of the guests. I was especially eager to see the tote bags, because I made the tags… but when I gave them to the bride, they didn’t have any farm animals on them yet!

chicken gift tag

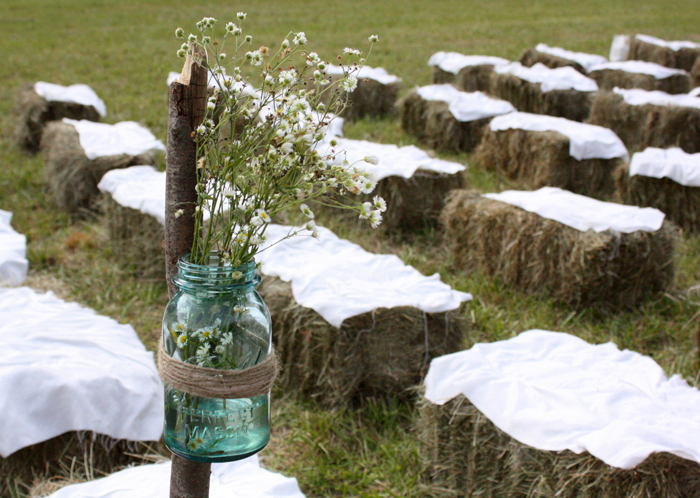
For the wedding ceremony, we sat on hay bales that were covered with white cloths. It was a warm summer afternoon, so there were baskets of woven fans available for all the guests.

hay bale seating for an outdoor wedding

The aisle was lined with simple wildflower bouquets in blue mason jars tied to sticks with twine.

wedding wildflower bouquet in a mason jar

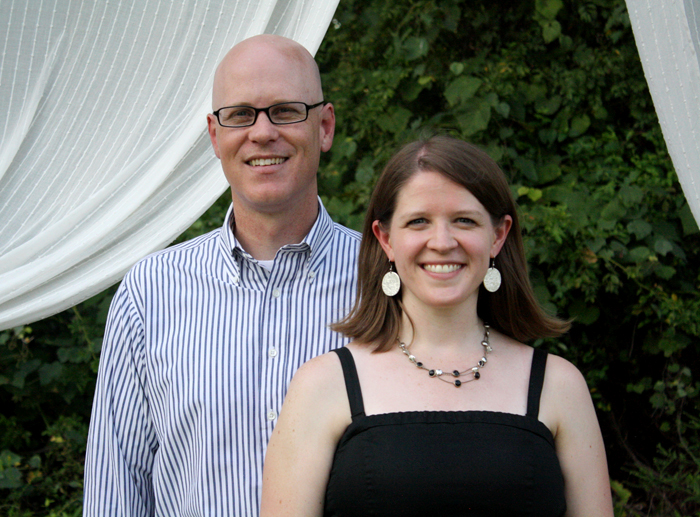
Between the ceremony and the reception, we made sure to visit the do-it-yourself photobooth. The white curtains and the woods made a lovely backdrop.

DIY wedding photobooth

We used the camera provided, but also took some shots with my camera. Not pictured: our kids + my expanding baby bump.

DIY wedding photobooth picture

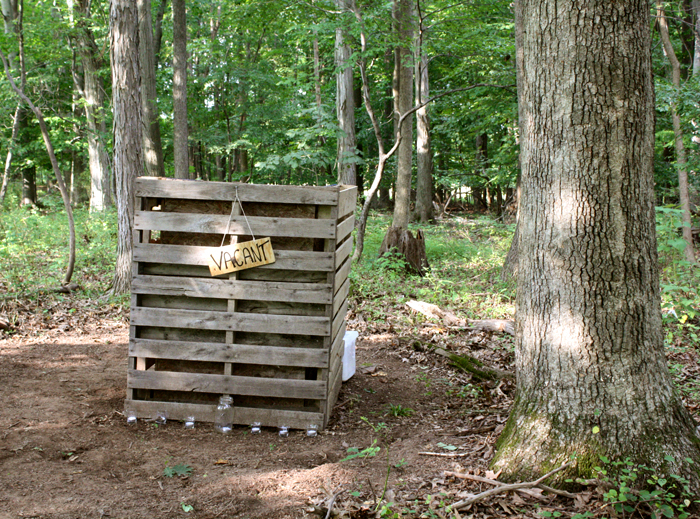
Most people don’t take pictures of the bathroom facilities at a wedding, but the setup was just too unusual not to share! As you may have noticed, the bride and groom planned a very green wedding… right down to the toilets. This sign greeted you at the edge of the meadow near the entrance to the woods.

outdoor wedding restroom sign

At the end of a short dirt path, guests could use one of two toilets. They were carefully angled away from guests and each other, because the fourth side of the toilet stall was completely open. It looks pretty primitive, but there was actually a regular toilet seat built in to the structure on top of some kind of container with wood shavings. It was much better than a port-a-potty (no smell! no icky door handle to touch! no claustrophobia!), but it was especially important to remember to flip that sign from vacant to occupied before entering.

outdoor restroom facilities

In spite of the rain that fell during the reception (good thing we were under a tent!), it was a lovely day celebrating a lovely couple. Congrats, Ben and Ashley!

a purple birthday party

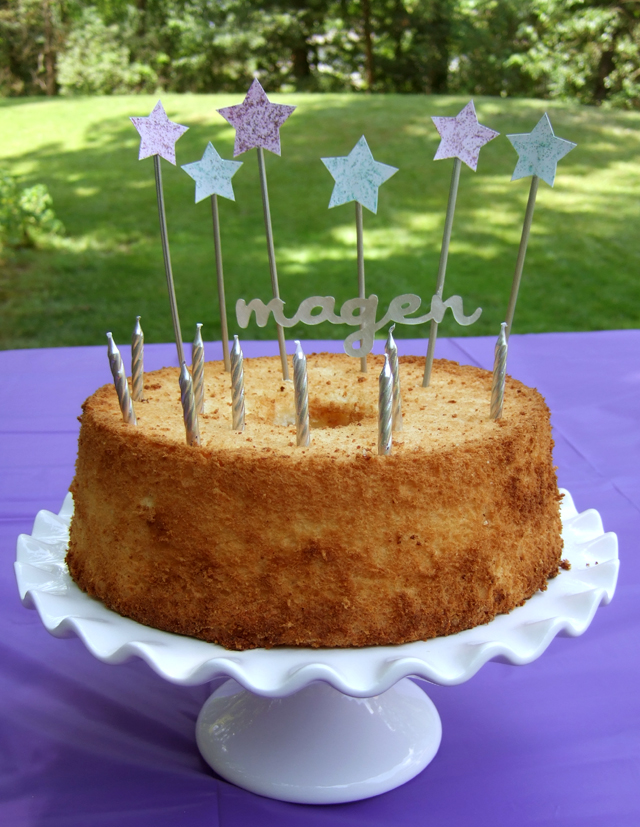
Stars, sparkles, and purple all came together for a fun birthday party for our sweet nine-year-old. Magen’s favorite cake is angel food, which means I didn’t have to attempt any fancy cake decorating (hooray!), but it did add the challenge of coming up with an interesting cake topper. Last year I just used tall spiral candles, but this year I made some sparkly stars with her name (which should have been higher up).

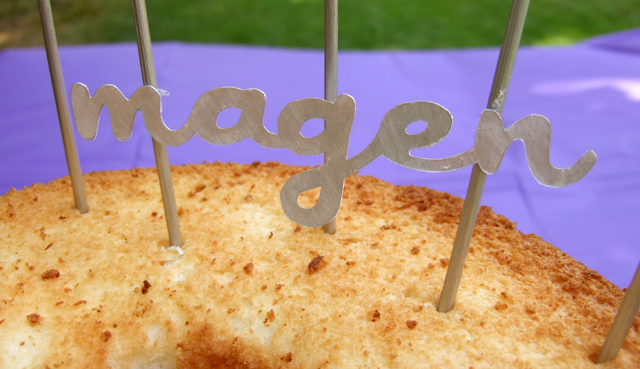
That’s not a custom metal topper — I just cut her name out of card stock with my X-Acto knife and painted it silver. (The font is Japan, which is a nice thick cursive font.)

Magen wanted to do some of the same activities this year that I had planned for her party last year, including a photoshoot with a giant number and a water balloon fight.

She also requested another treasure hunt, so this year I came up with various activities that would each reveal a clue about where to look for the next clue. It was somewhat complicated to get it all planned out, but also very fun. The girls played charades, Wheel of Fortune, balloon darts, and other games. I didn’t have a Wheel of Fortune game, and couldn’t seem to track one down among any of my friends, so I made my own (of course). I just taped little pieces of paper over the letters written on a chalkboard, and the girls took turns spinning a little spinner to win another Starburst before they guessed a letter.

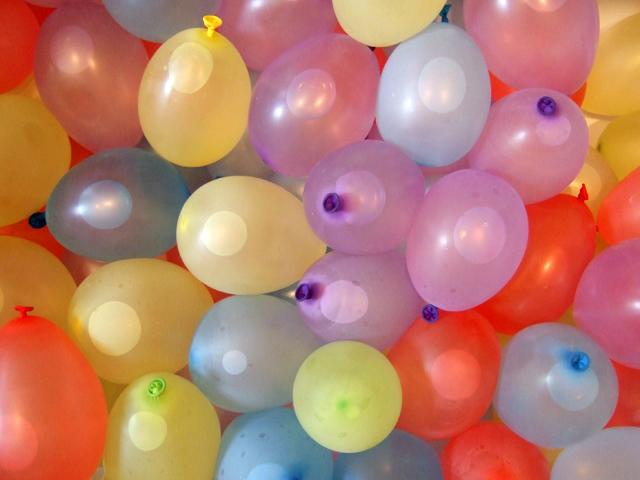
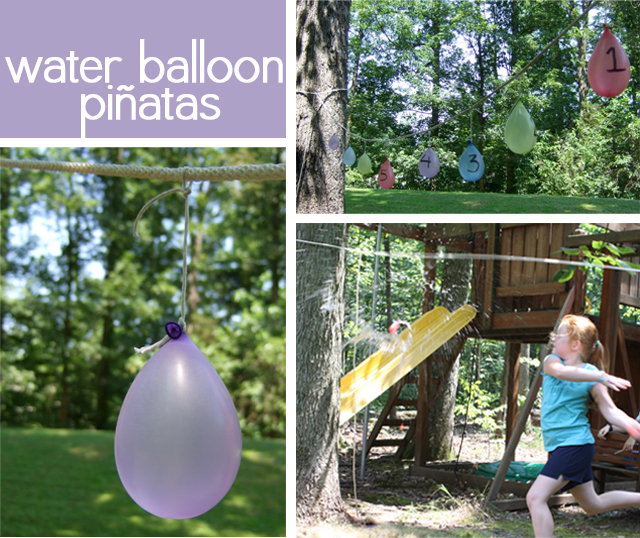
The girls also enjoyed hitting water balloon piñatas, an idea I got from Scrap Happy Heather. I hung the balloons from a rope tied between two trees, and the girls took turns whacking the balloons with a bat. With a camera in my hand, I made sure I stayed out of the splash zone!

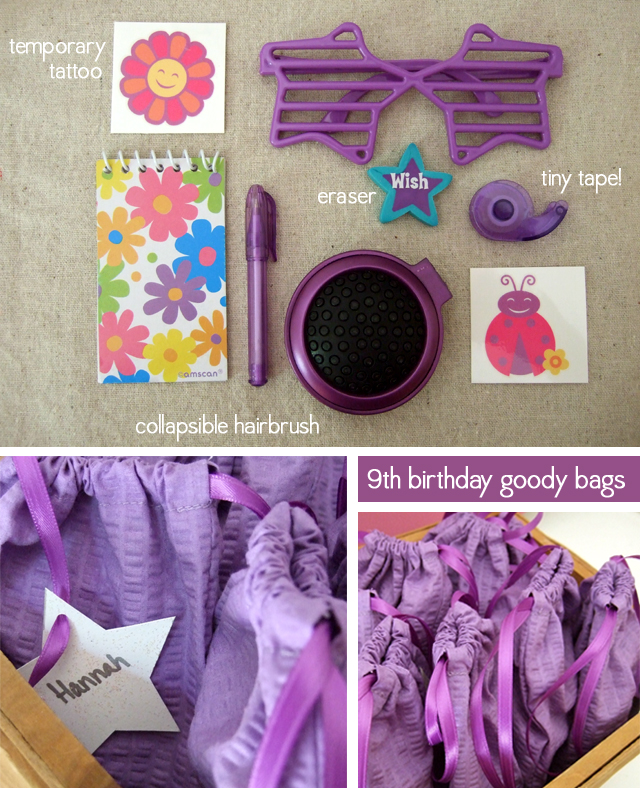
At the end of the treasure hunt, the girls found drawstring goody bags full of fun little trinkets that almost made me wish I were a nine-year-old again.

stitched photo note cards

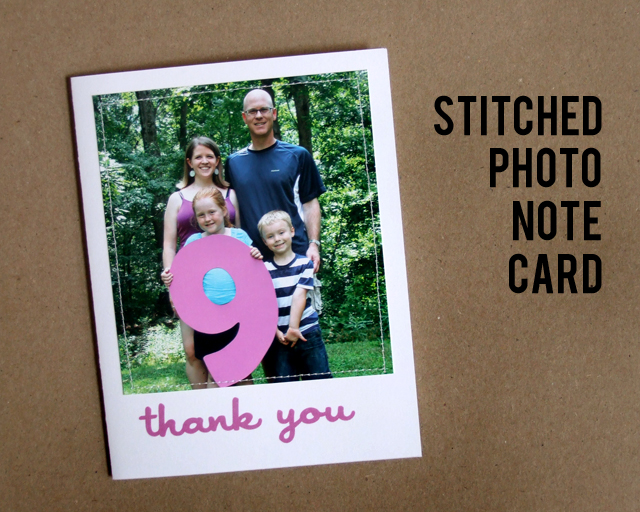
Call me old fashioned, but I still believe in the value of a handwritten thank you note, whether it’s for a gift or a kind deed. Friends who celebrate your 9th birthday in the backyard and grandparents who send gifts from a distance all deserve to be thanked for their generosity.

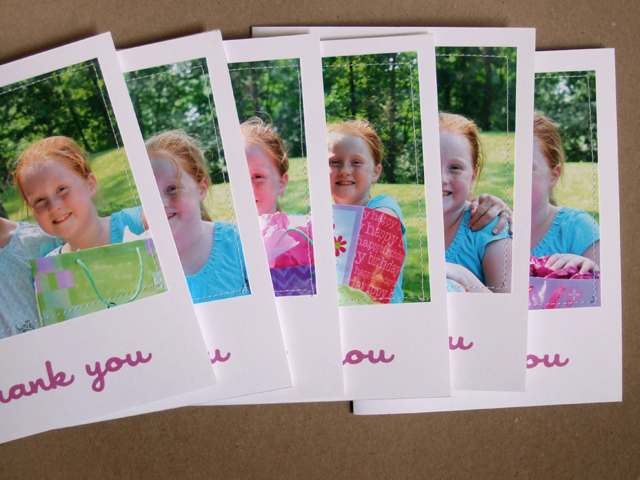
During Magen’s birthday party, we snapped a photo of her with each of her friends just before she opened their gift. Then I printed out the photos, trimmed them, and stitched each one to a piece of cardstock printed with a simple “thank you.” Inside Magen wrote a sweet little note of appreciation.

Family members who live at a distance received cards with our family photo, but the cards with colorful pictures from her party are my favorites. By the way, I made that great big number 9 Magen is holding in the same way I made the giant number 8 last year. It’s just foam core and acrylic paint. So fun!

mini bunting birthday party invitation

Yesterday we mailed out a stack of invitations to a birthday party for a girl who will soon be nine years old. (Didn’t she just turn eight?)

party invitations

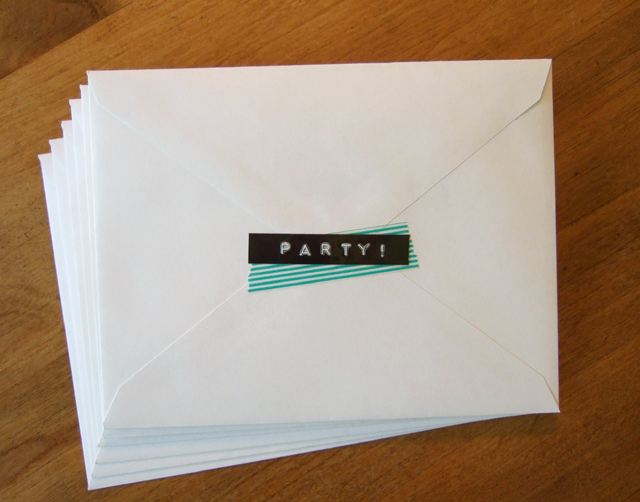
Washi tape and an old-school Dymo label are my envelope embellishments of choice these days, but this was the first time the label has instructed the recipient to PARTY! Inside the envelope, each girl will find a mini party — or at least a sneak preview of the birthday party they’re being invited to.

mini bunting party invitation

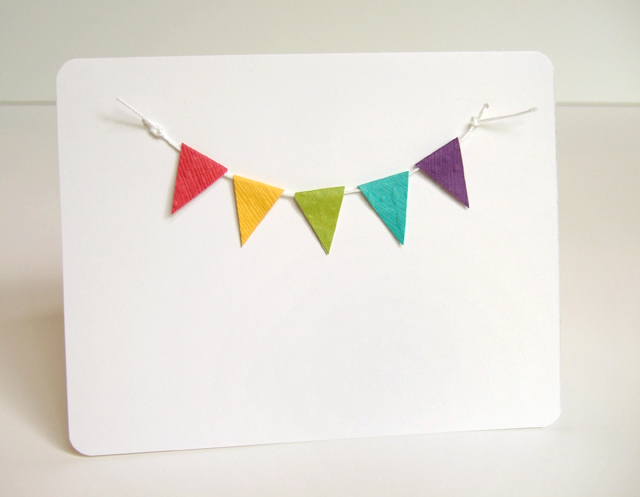
The birthday party invitation is a simple white card with a mini paper flag bunting on the front and party details printed inside. I punched two tiny holes near each of the upper corners and tied on a piece of white crochet cotton. Then I hung the folded pennant flags over the string and glued them together, trying to avoid gluing them to the string.

mini bunting party invitation

The tiny flags were cut from sheets of 12×12″ textured cardstock that I bought for 47 cents each. So for less than $2.50, I’ve made six birthday party invitations and about 40 feet of flag bunting to hang at the party.

I love how the bunting looks when it’s literally tied to the card, but if you have either less time or less patience, stitching the flags to the card would also work just fine.

love more

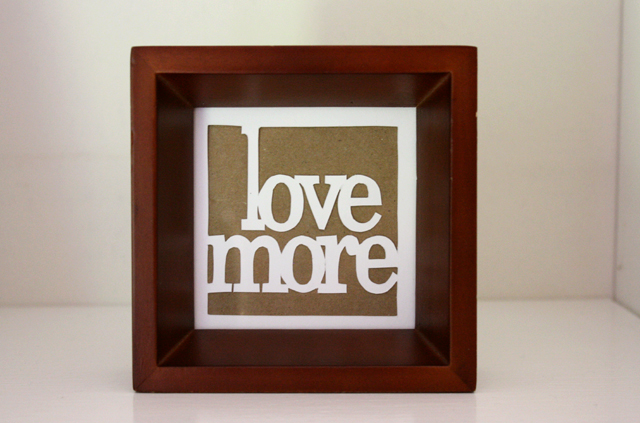
I’ve dabbled in the art of papercutting for more than a decade. Initially I used patterns I found online, but later I made a few of my own designs. My original work tends to be very simple, such as this tiny papercut I made a couple months ago.

The frame holds a picture that is less than three inches square, so I chose a very short inspirational phrase. I cut the words out of a sheet of white cardstock with my X-Acto knife, making the words and white frame all one continuous piece of paper, which I then mounted on a kraft background.

And now this little papercut sits on the shelf in our laundry room, serving as a frequent reminder to love, love, and love some more. Because really, no matter how much you’re loved, who wouldn’t benefit from more love?

perpetual calendar micro-journal

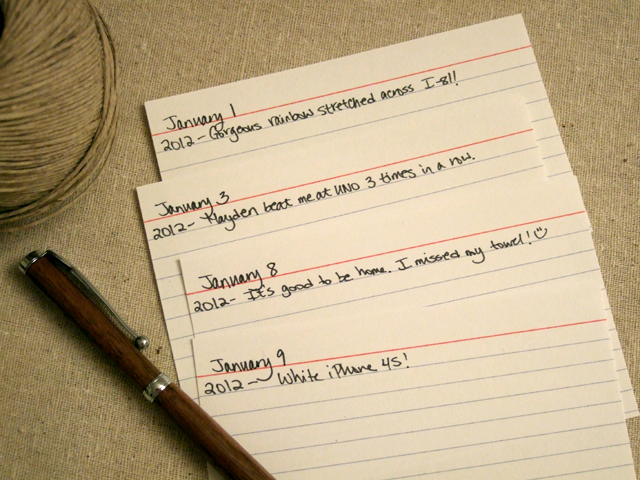
The beginning of a new year is a perfect time to start a new daily project, especially one that involves both a calendar and a journal. Over the holidays I spent some quality time with 366 index cards and a Sharpie pen to create this perpetual calendar micro-journal.

My perpetual calendar micro-journal was directly inspired by a very similar project I saw on Design*Sponge more than a year ago. At the top of each index card, I wrote the month and day, and then each day I write one line about something I did or thought that day. A year from now, it will be fun to look back and remember what I was thinking and doing a year earlier. By the time the cards are filled up, I will have recorded a decade of memories.

It’s tempting to wish I had significant things to write each day, but for now I’m really enjoying jotting down simple notes about everyday activities. It’s helping me to notice the small things, and I’m intrigued by the opportunity to record moments that would otherwise slip away and be forgotten.

While I certainly can’t capture much depth or detail, right now this micro-journal is a good format for me. It only takes a moment to jot down a memory before I crawl into bed each night.

What about you? Do you keep a daily journal or diary? Is it handwritten? Electronic? Do you leave it on your nightstand, or keep it under lock and key? I’d love to know.

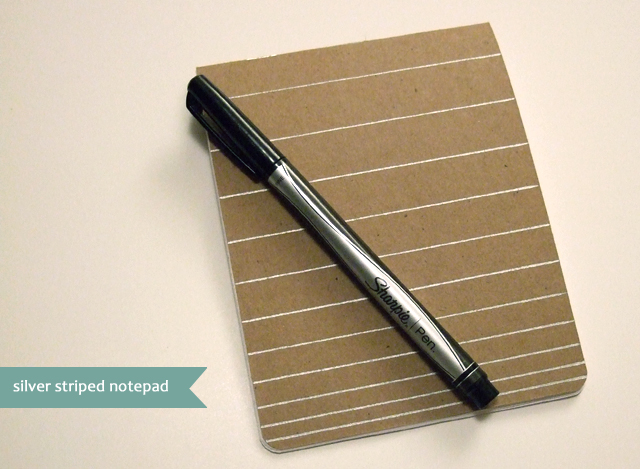
silver striped notepad

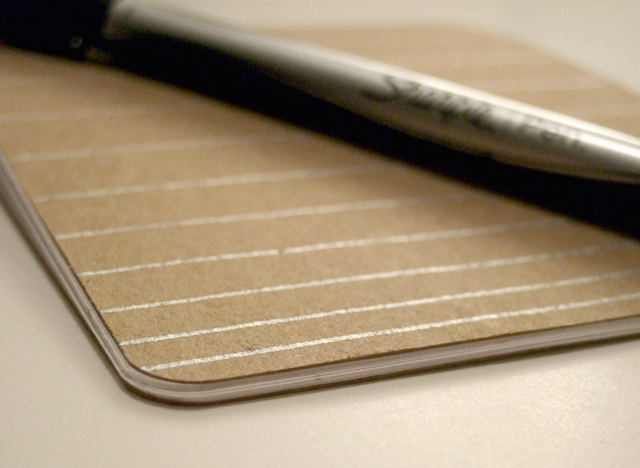
In spite of the fact that I already have plenty of little notepads and tablets, I wanted something new and special to jot notes on during a conference/retreat that I’m attending this weekend. So last night I sat down and whipped up this little silver striped notepad.

I made a lengthwise cut right down the middle of an 8.5×11″ sheet of kraft cardstock to make the cover, and then did the same with three sheets of printer paper to make the interior pages. I drew stripes on the cover with a silver marker, folded everything in half, and then stapled it all together at the top. I trimmed a little excess white paper off the bottom and then rounded the bottom corners with a little corner punch.

My notepad only has 12 pages, and I hope to fill them with lots of great ideas this weekend.

Happy weekend, friends!

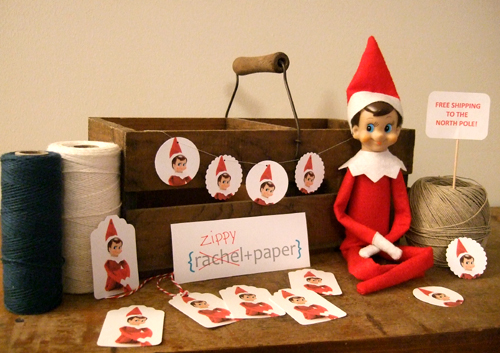
zippy+paper: an elf’s Etsy shop

Zippy must have read my announcement last night about free shipping on all {rachel+paper} orders today. While we were sleeping, he set up a little paper goods shop of his own with free shipping to the North Pole.

So if your elf needs any gift tags or garlands for their holiday celebrations, be sure to tell them to stop by {zippy+paper} today!

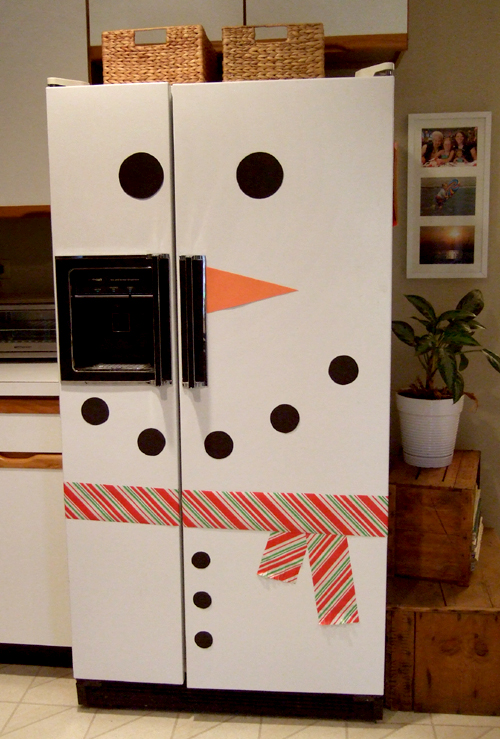
refrigerator snowman

Last night I added a touch of wintry whimsy to our home by turning our white refrigerator into a snowman.

I can’t take any credit for the idea, as I pretty much copied this refrigerator snowman that I discovered via Pinterest. Thanks, Tami!